Deploy and Configure AstrBot
Deploy via Docker
Make sure Docker and Git are installed in your environment.If your network environment is within mainland China, the above command may fail to pull images. You may need to modify thecompose.ymlfile and replaceimage: soulter/astrbot:latestwithimage: m.daocloud.io/docker.io/soulter/astrbot:latest.
Access the AstrBot WebUI
astrbot. After logging in, you will be prompted to change the default password.
Configure the chat model
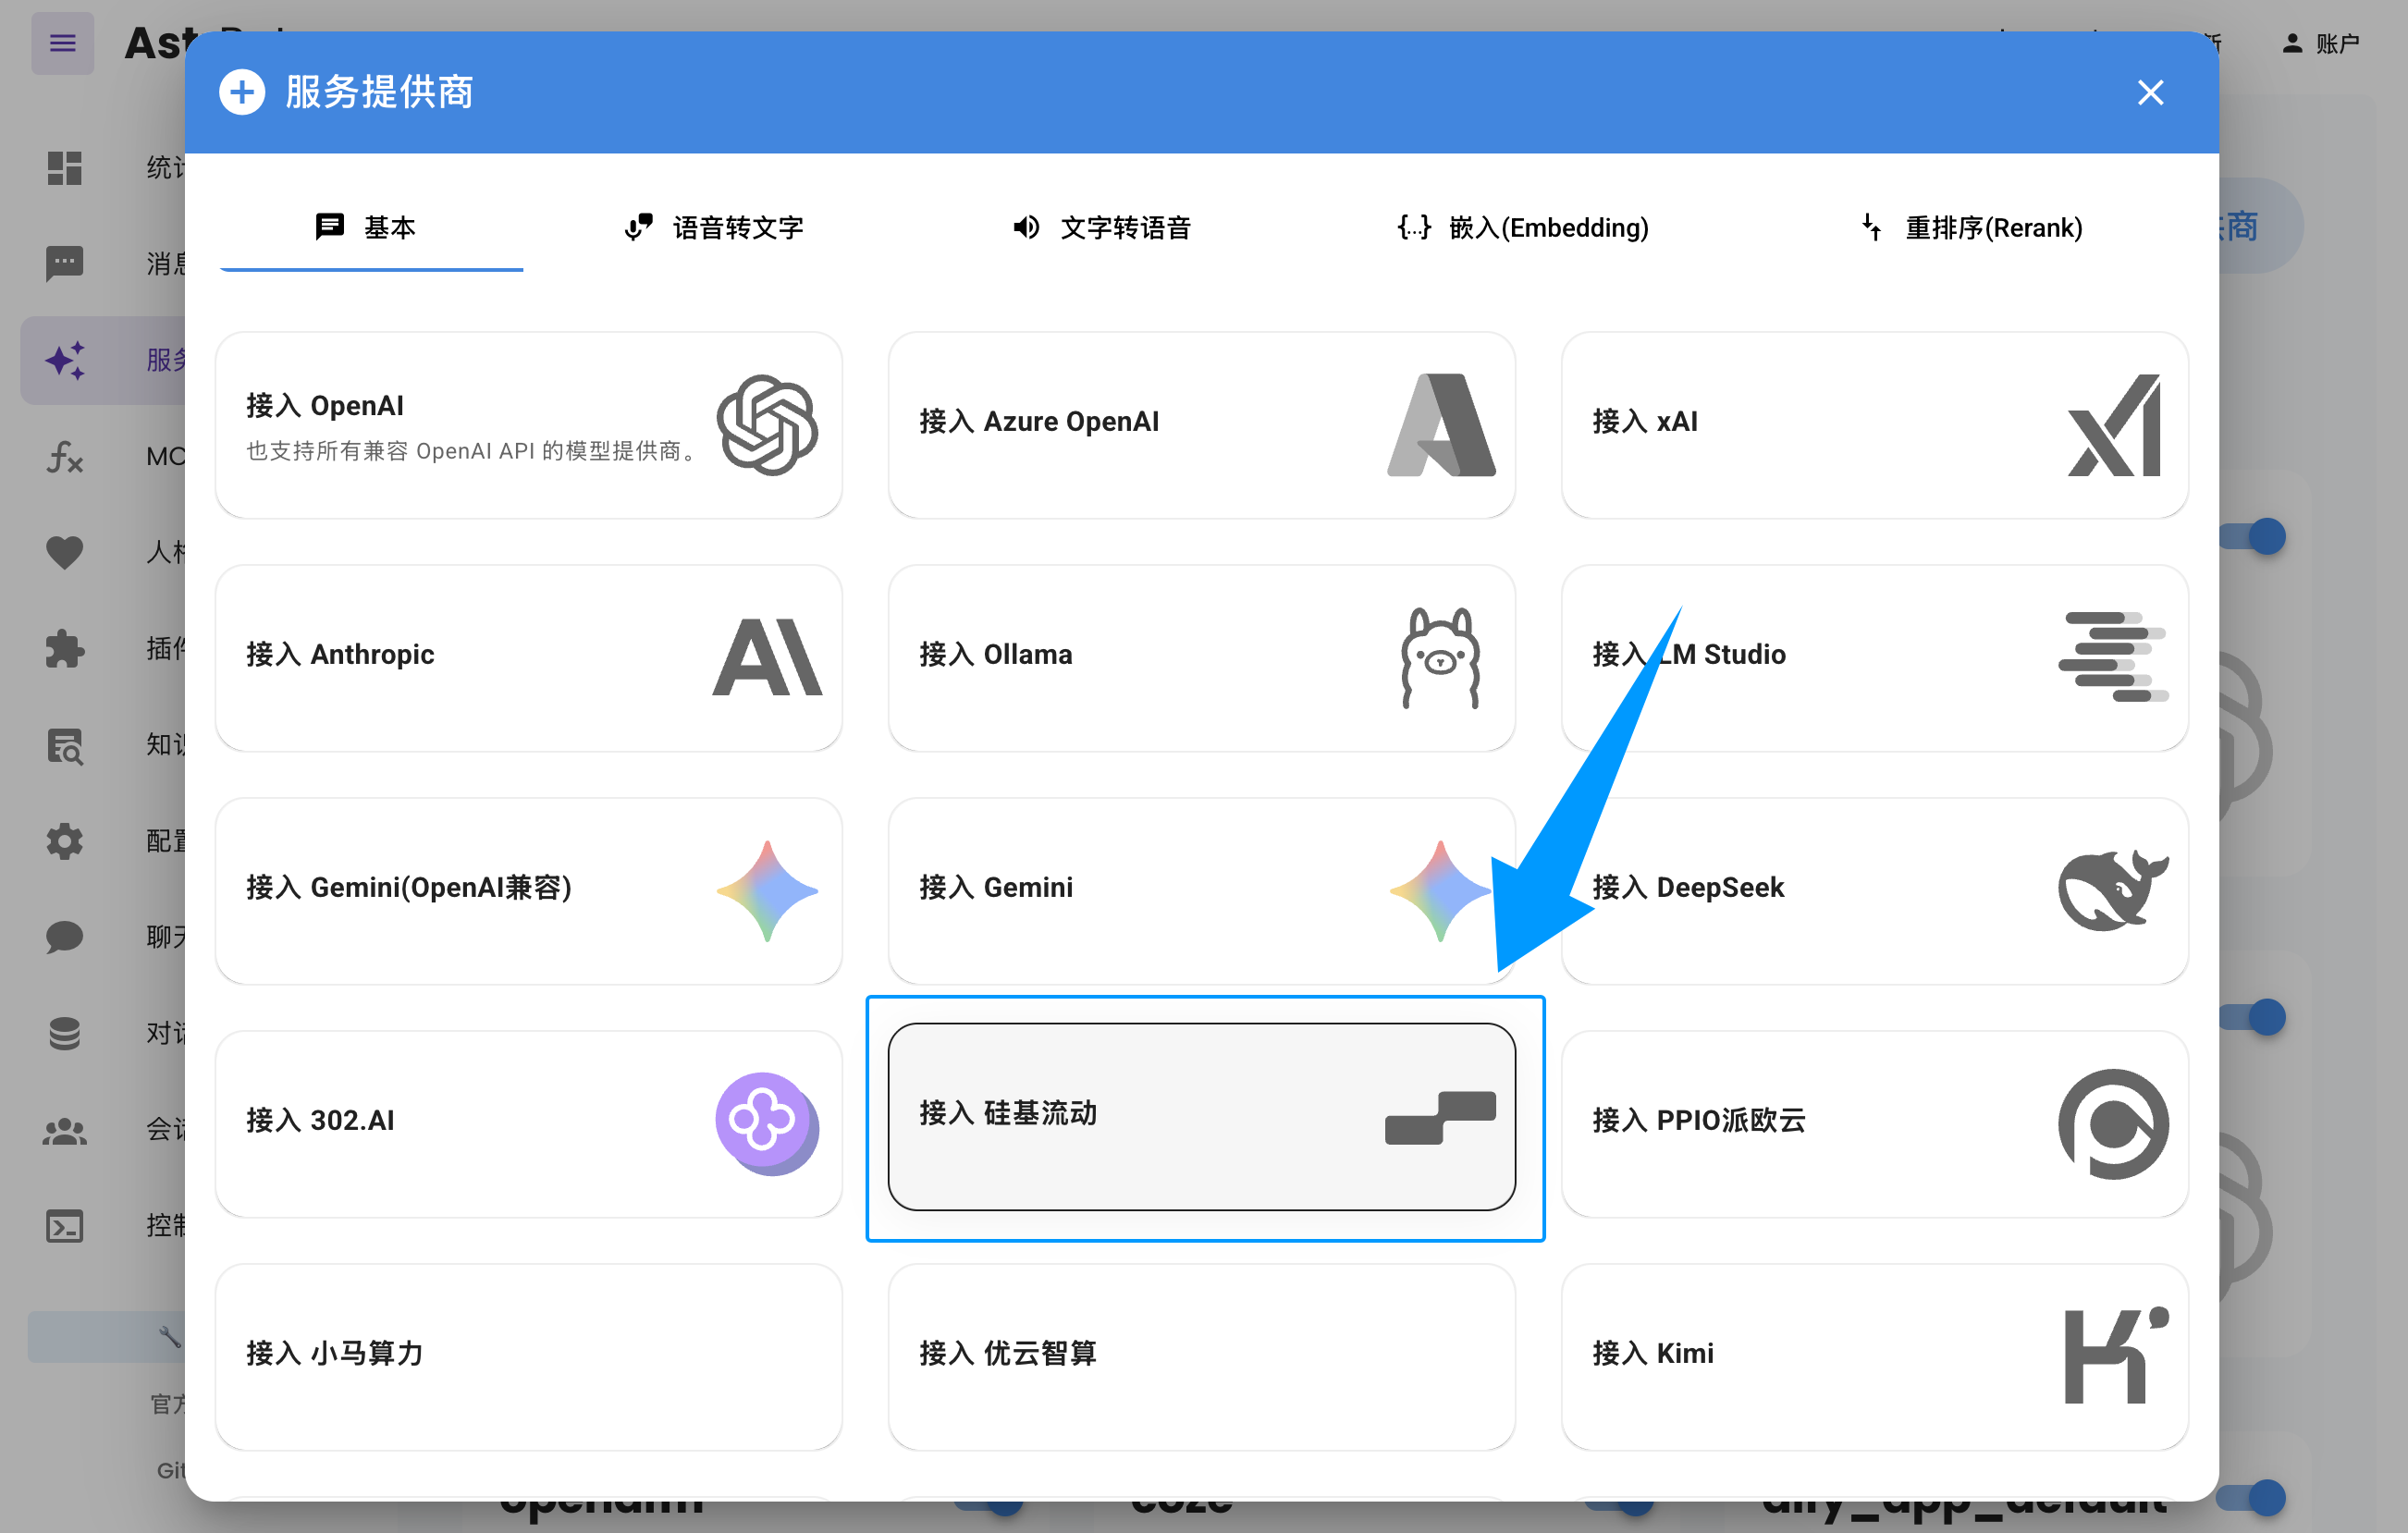
On SiliconFlow’s API Keys page, create a new API Key and keep it handy. On SiliconFlow’s Models page, choose the model you want to use and keep the model name handy. Open the AstrBot WebUI and clickService Providers in the left sidebar → Add Provider → select SiliconFlow.
Paste the API Key and Model Name you created/selected above, click Save to finish creating. You can click Refresh under Service Provider Availability to test whether the configuration is successful.
Online chat test (optional)
You can test your configured model on theChat page in the left sidebar of the AstrBot WebUI.
Connect a Messaging Platform (Feishu as an example)
Feishu (Lark) is used here as an example. You can go to the AstrBot Docs ->Deployment -> Deploy Messaging Platform to see how to connect other platforms.
Create a Feishu bot
Go to the Developer Console and create an enterprise self-built app.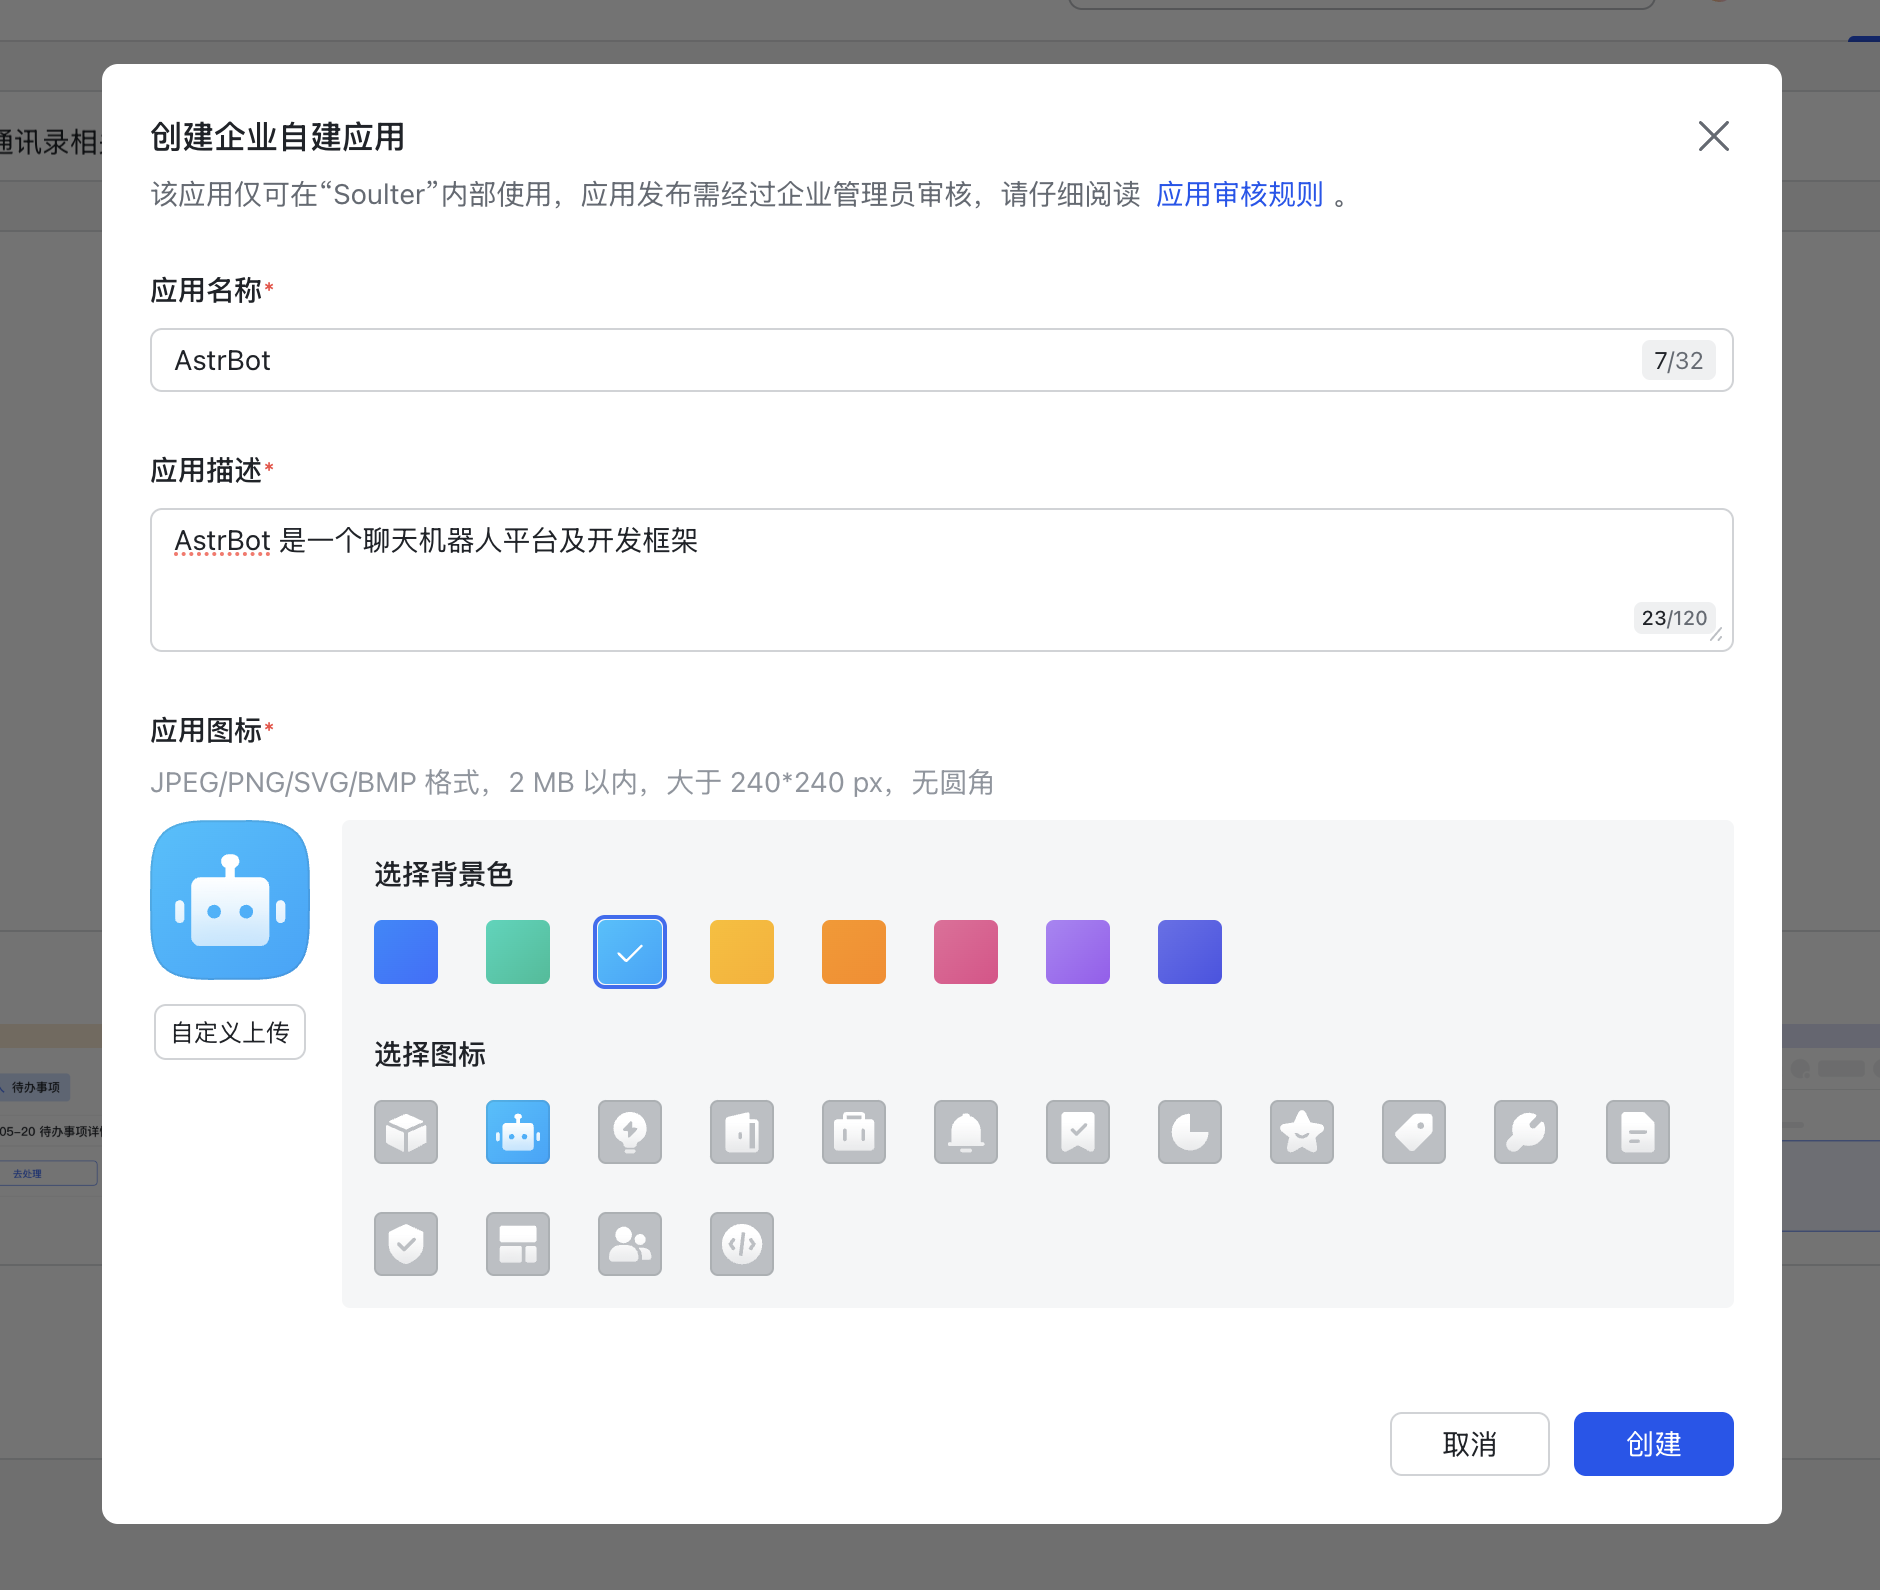
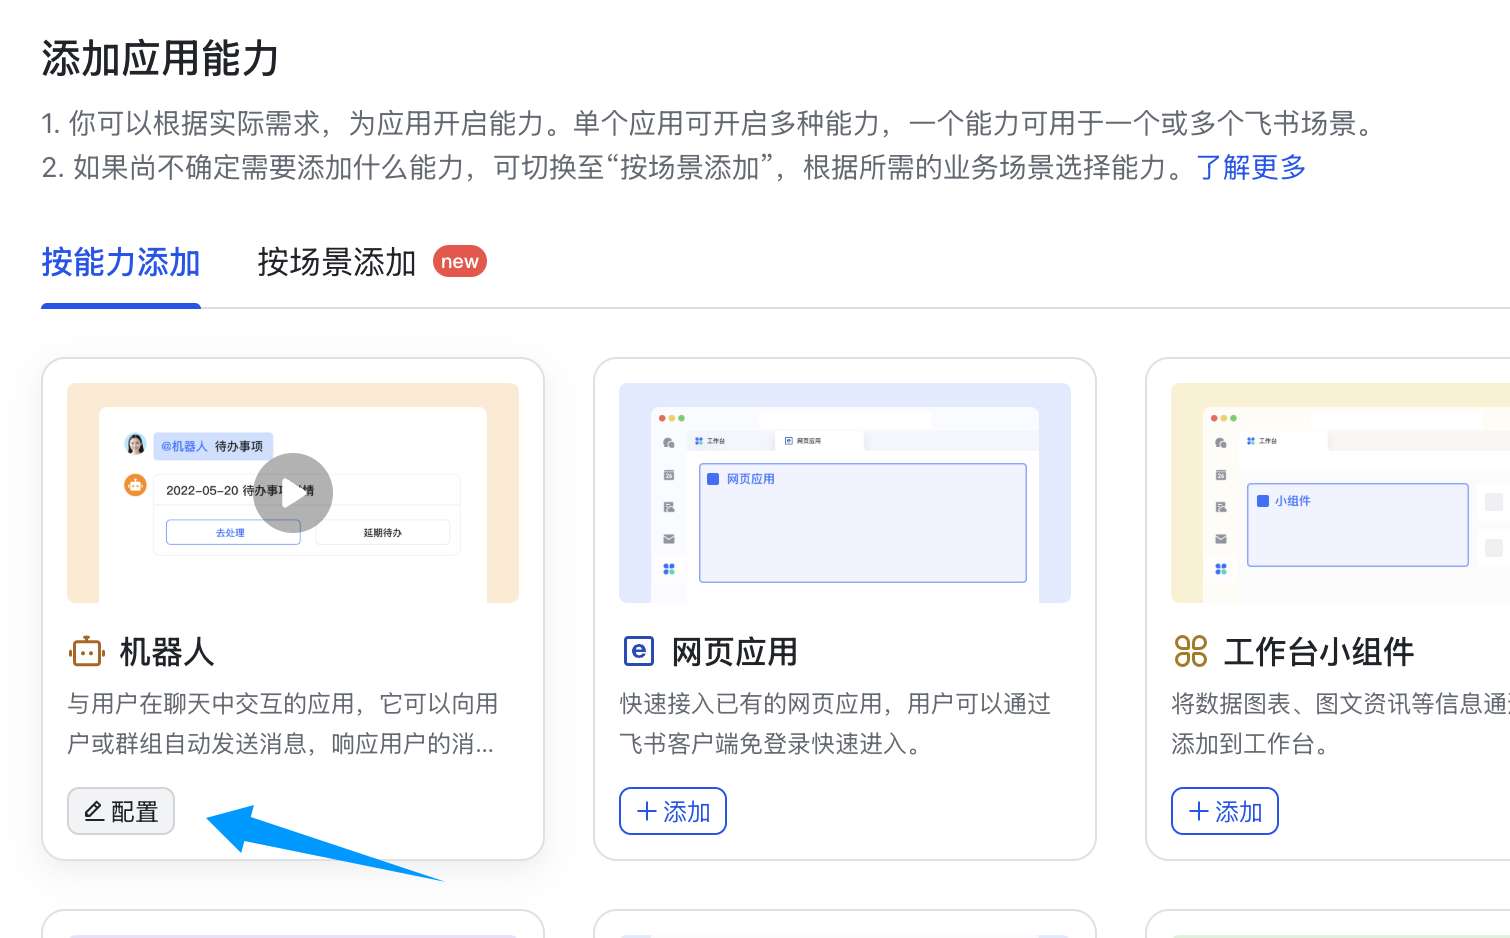
app_id and app_secret.

Configure AstrBot
- Enter AstrBot’s admin panel
- Click
Botson the left sidebar - In the right-hand panel, click
+ Create Bot - Select
lark (Feishu)
- ID: Fill in arbitrarily; used to distinguish different messaging platform instances.
- Enabled: Check this.
- app_id: Your obtained
app_id - app_secret: Your obtained
app_secret - The Feishu bot’s name
domain to https://open.larksuite.com.
Under Configuration File, click the ↗️ arrow button to the right of Select Configuration File.
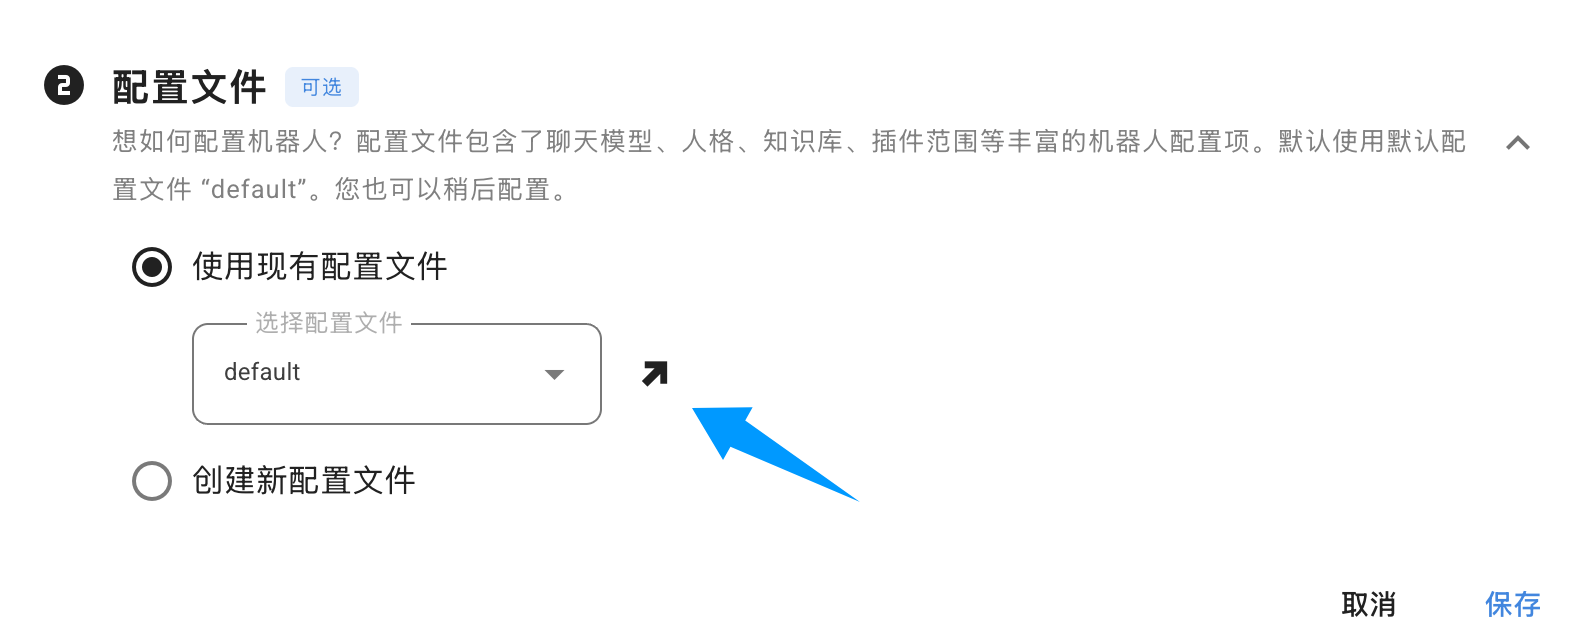
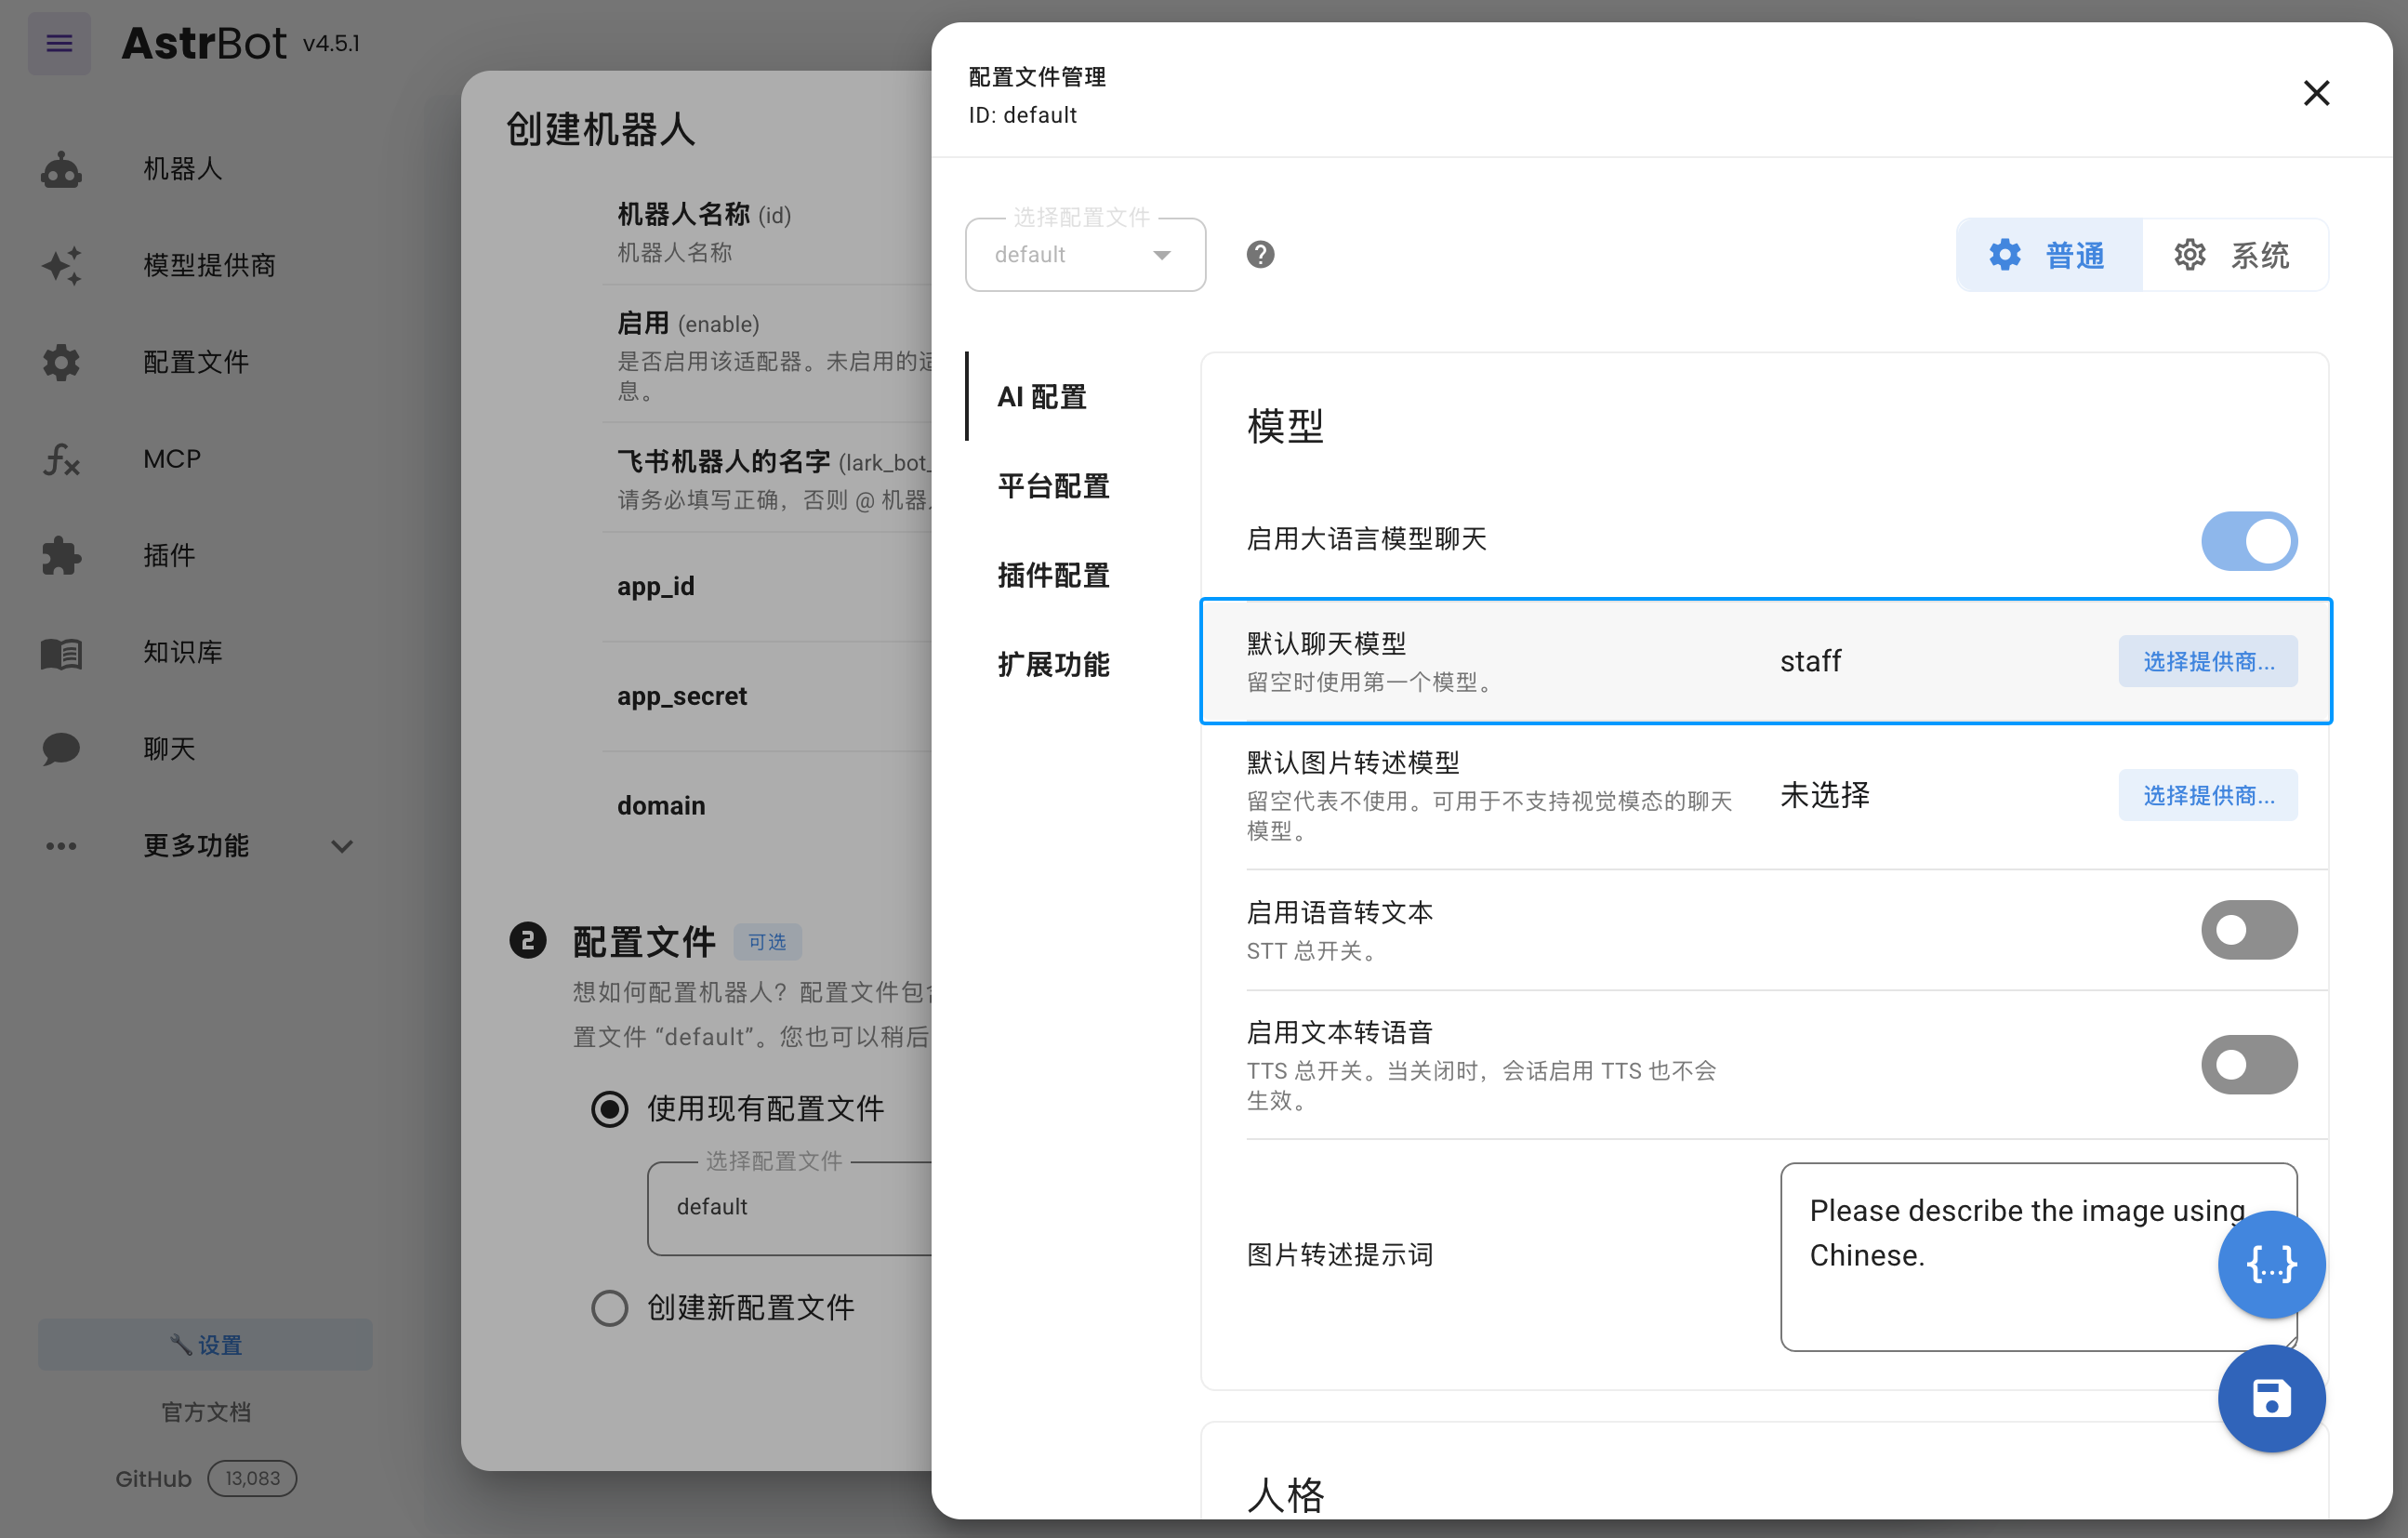
Saveto create the bot.
Set callbacks and permissions
Next, click “Events & Callbacks,” choose long-connection to receive events, and click Save. If the previous step did not successfully start, you won’t be able to save here.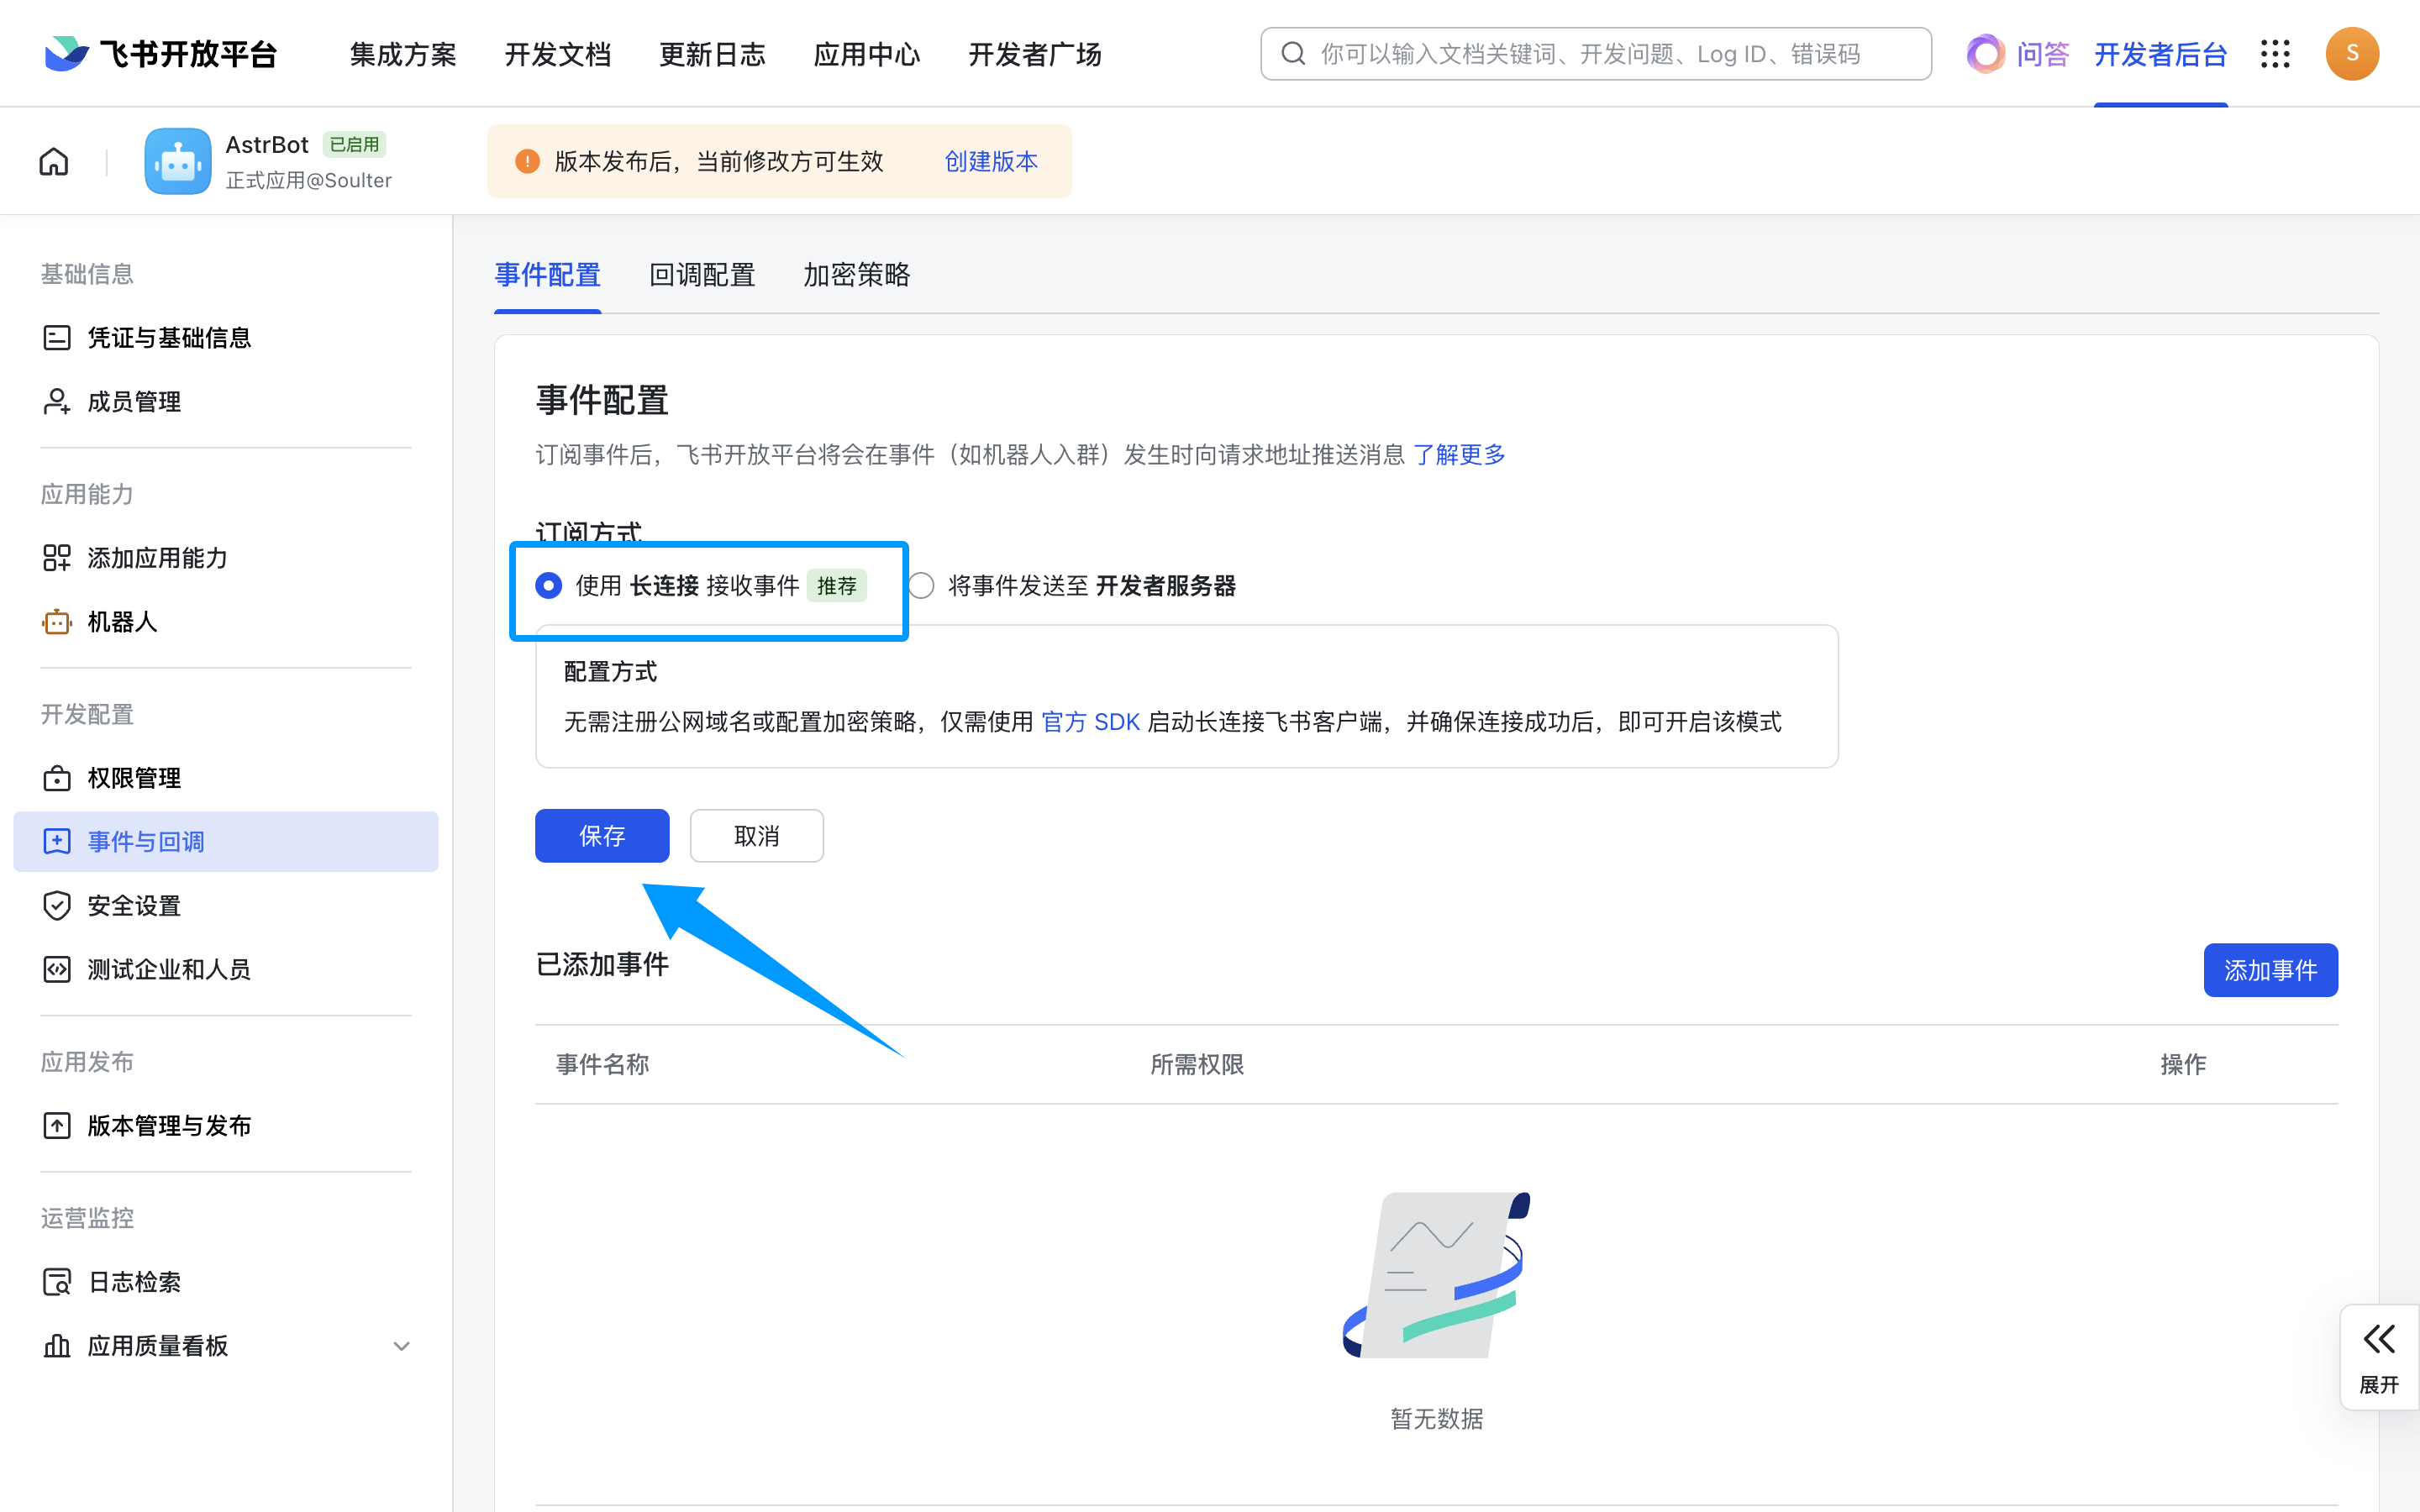
Receive Messages, and add it.
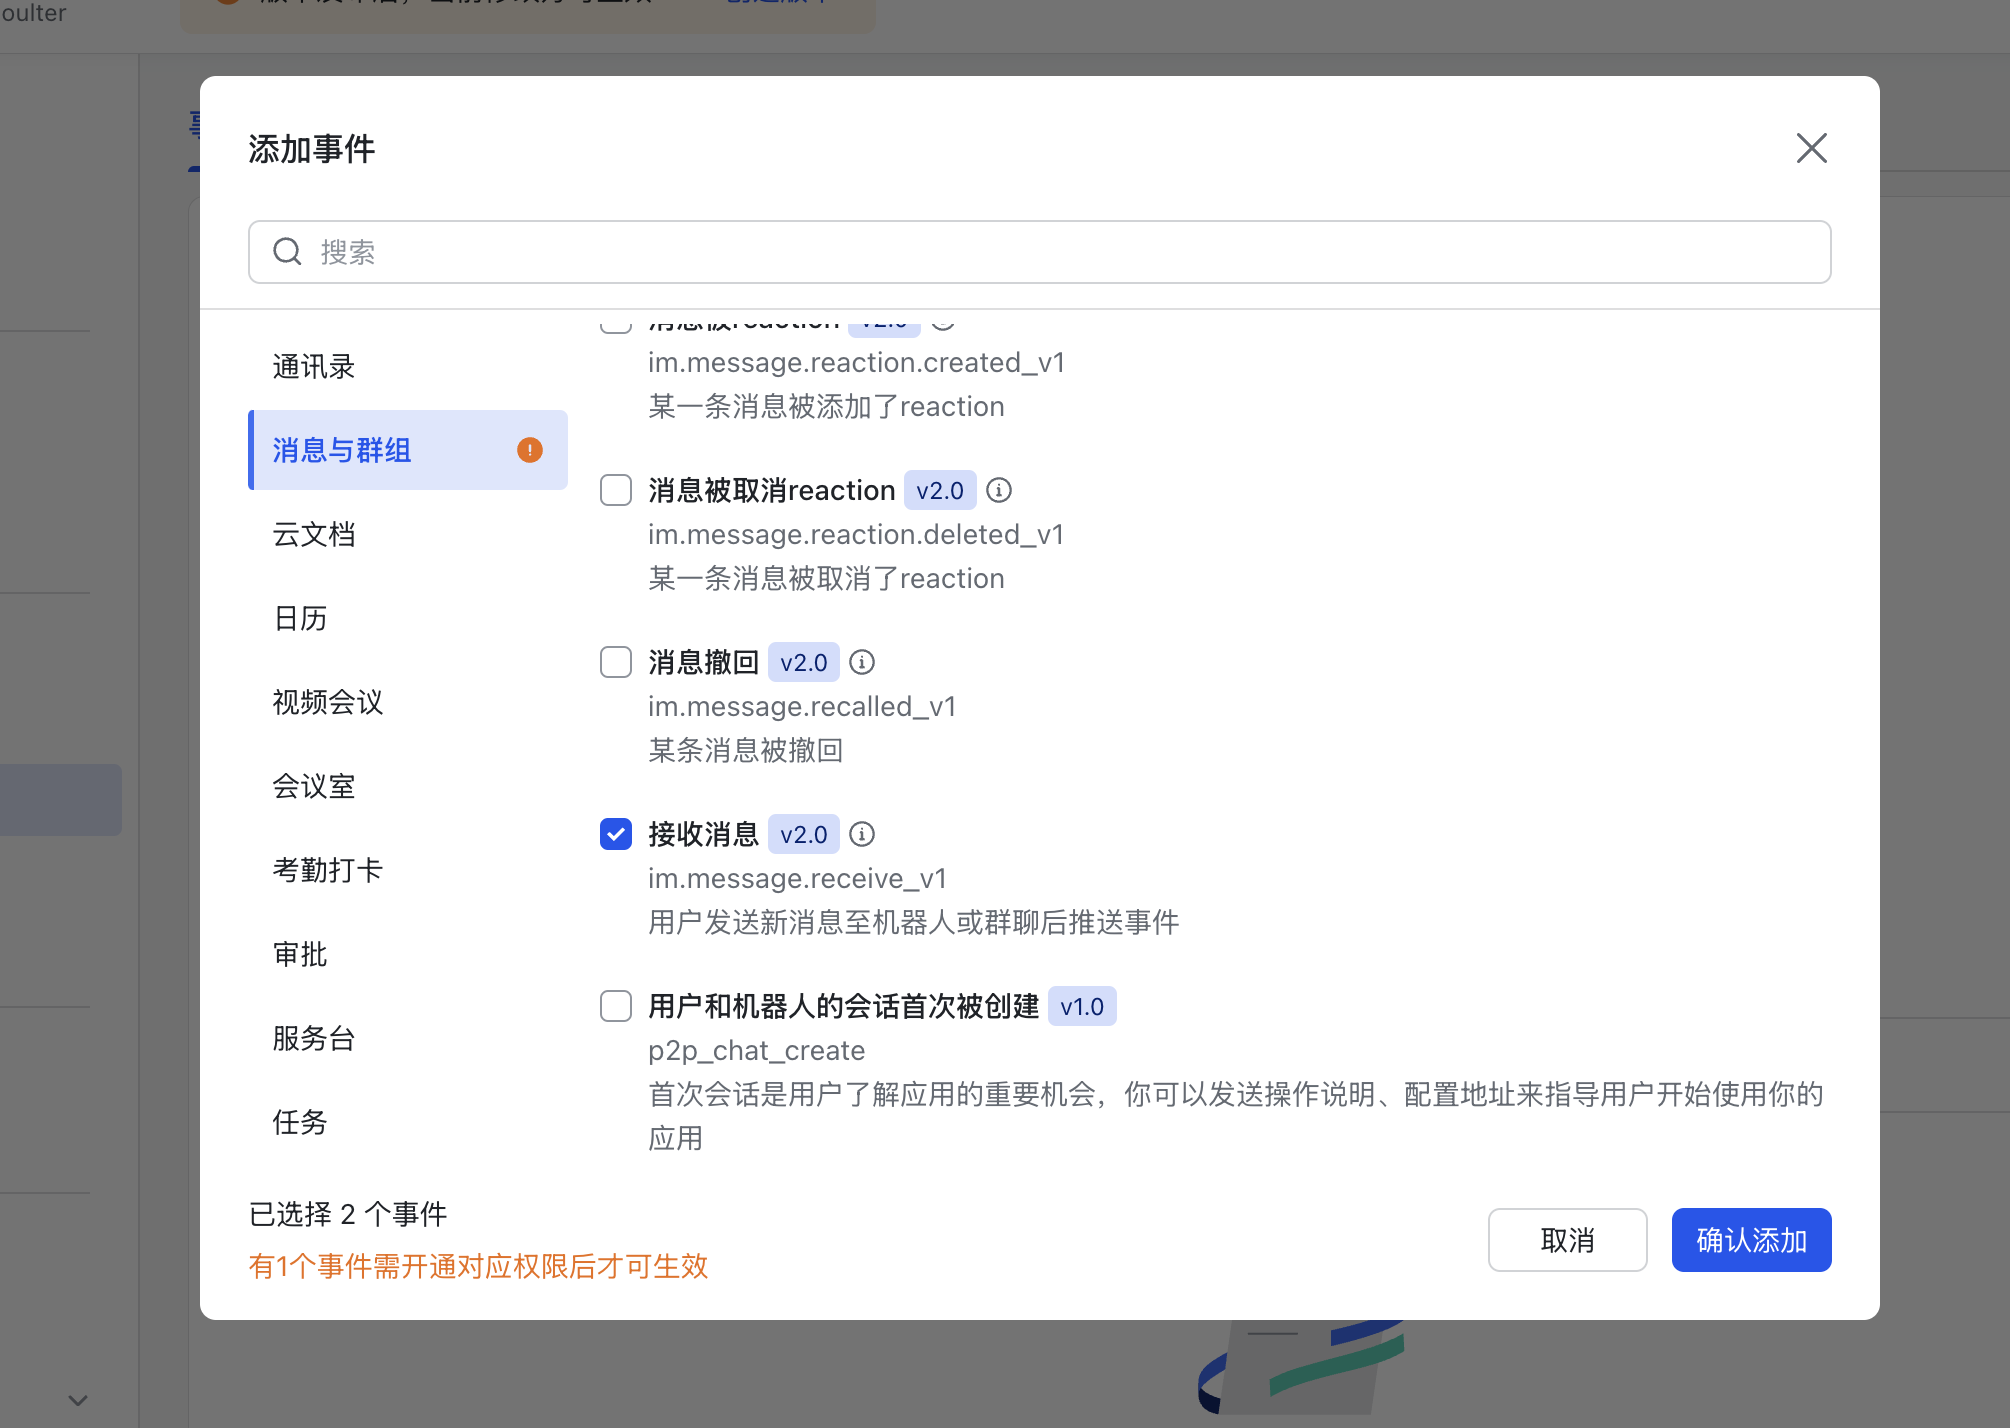
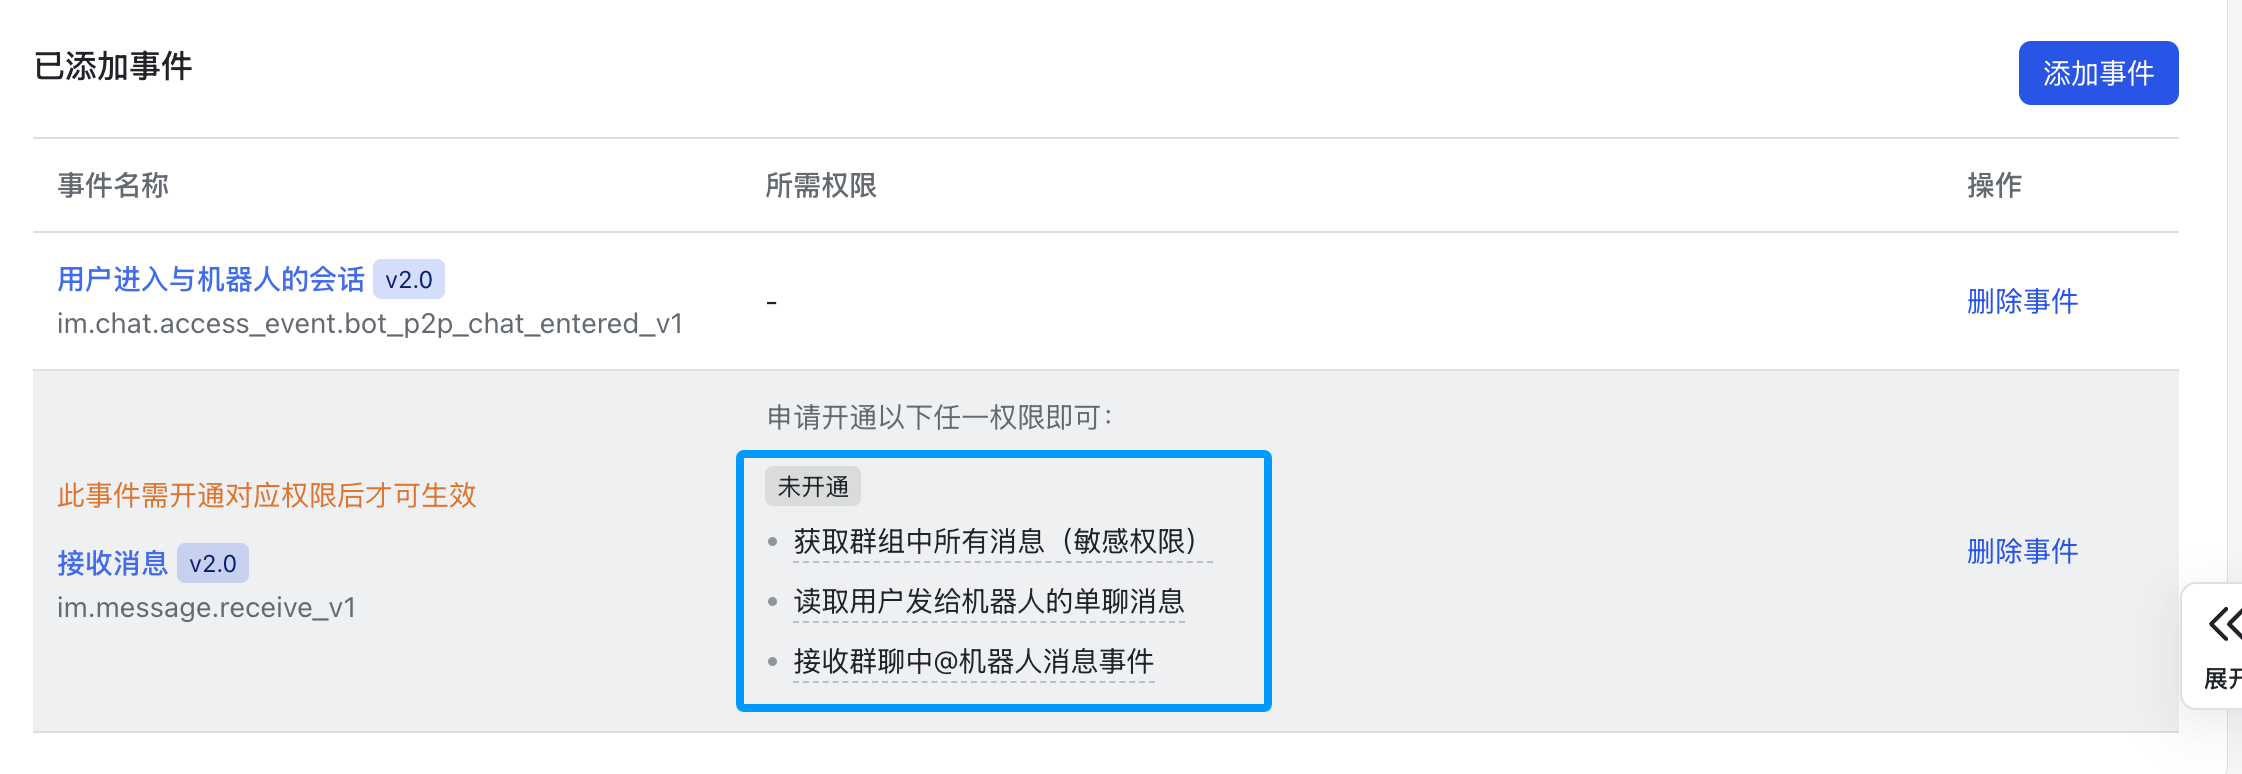
Save button above.
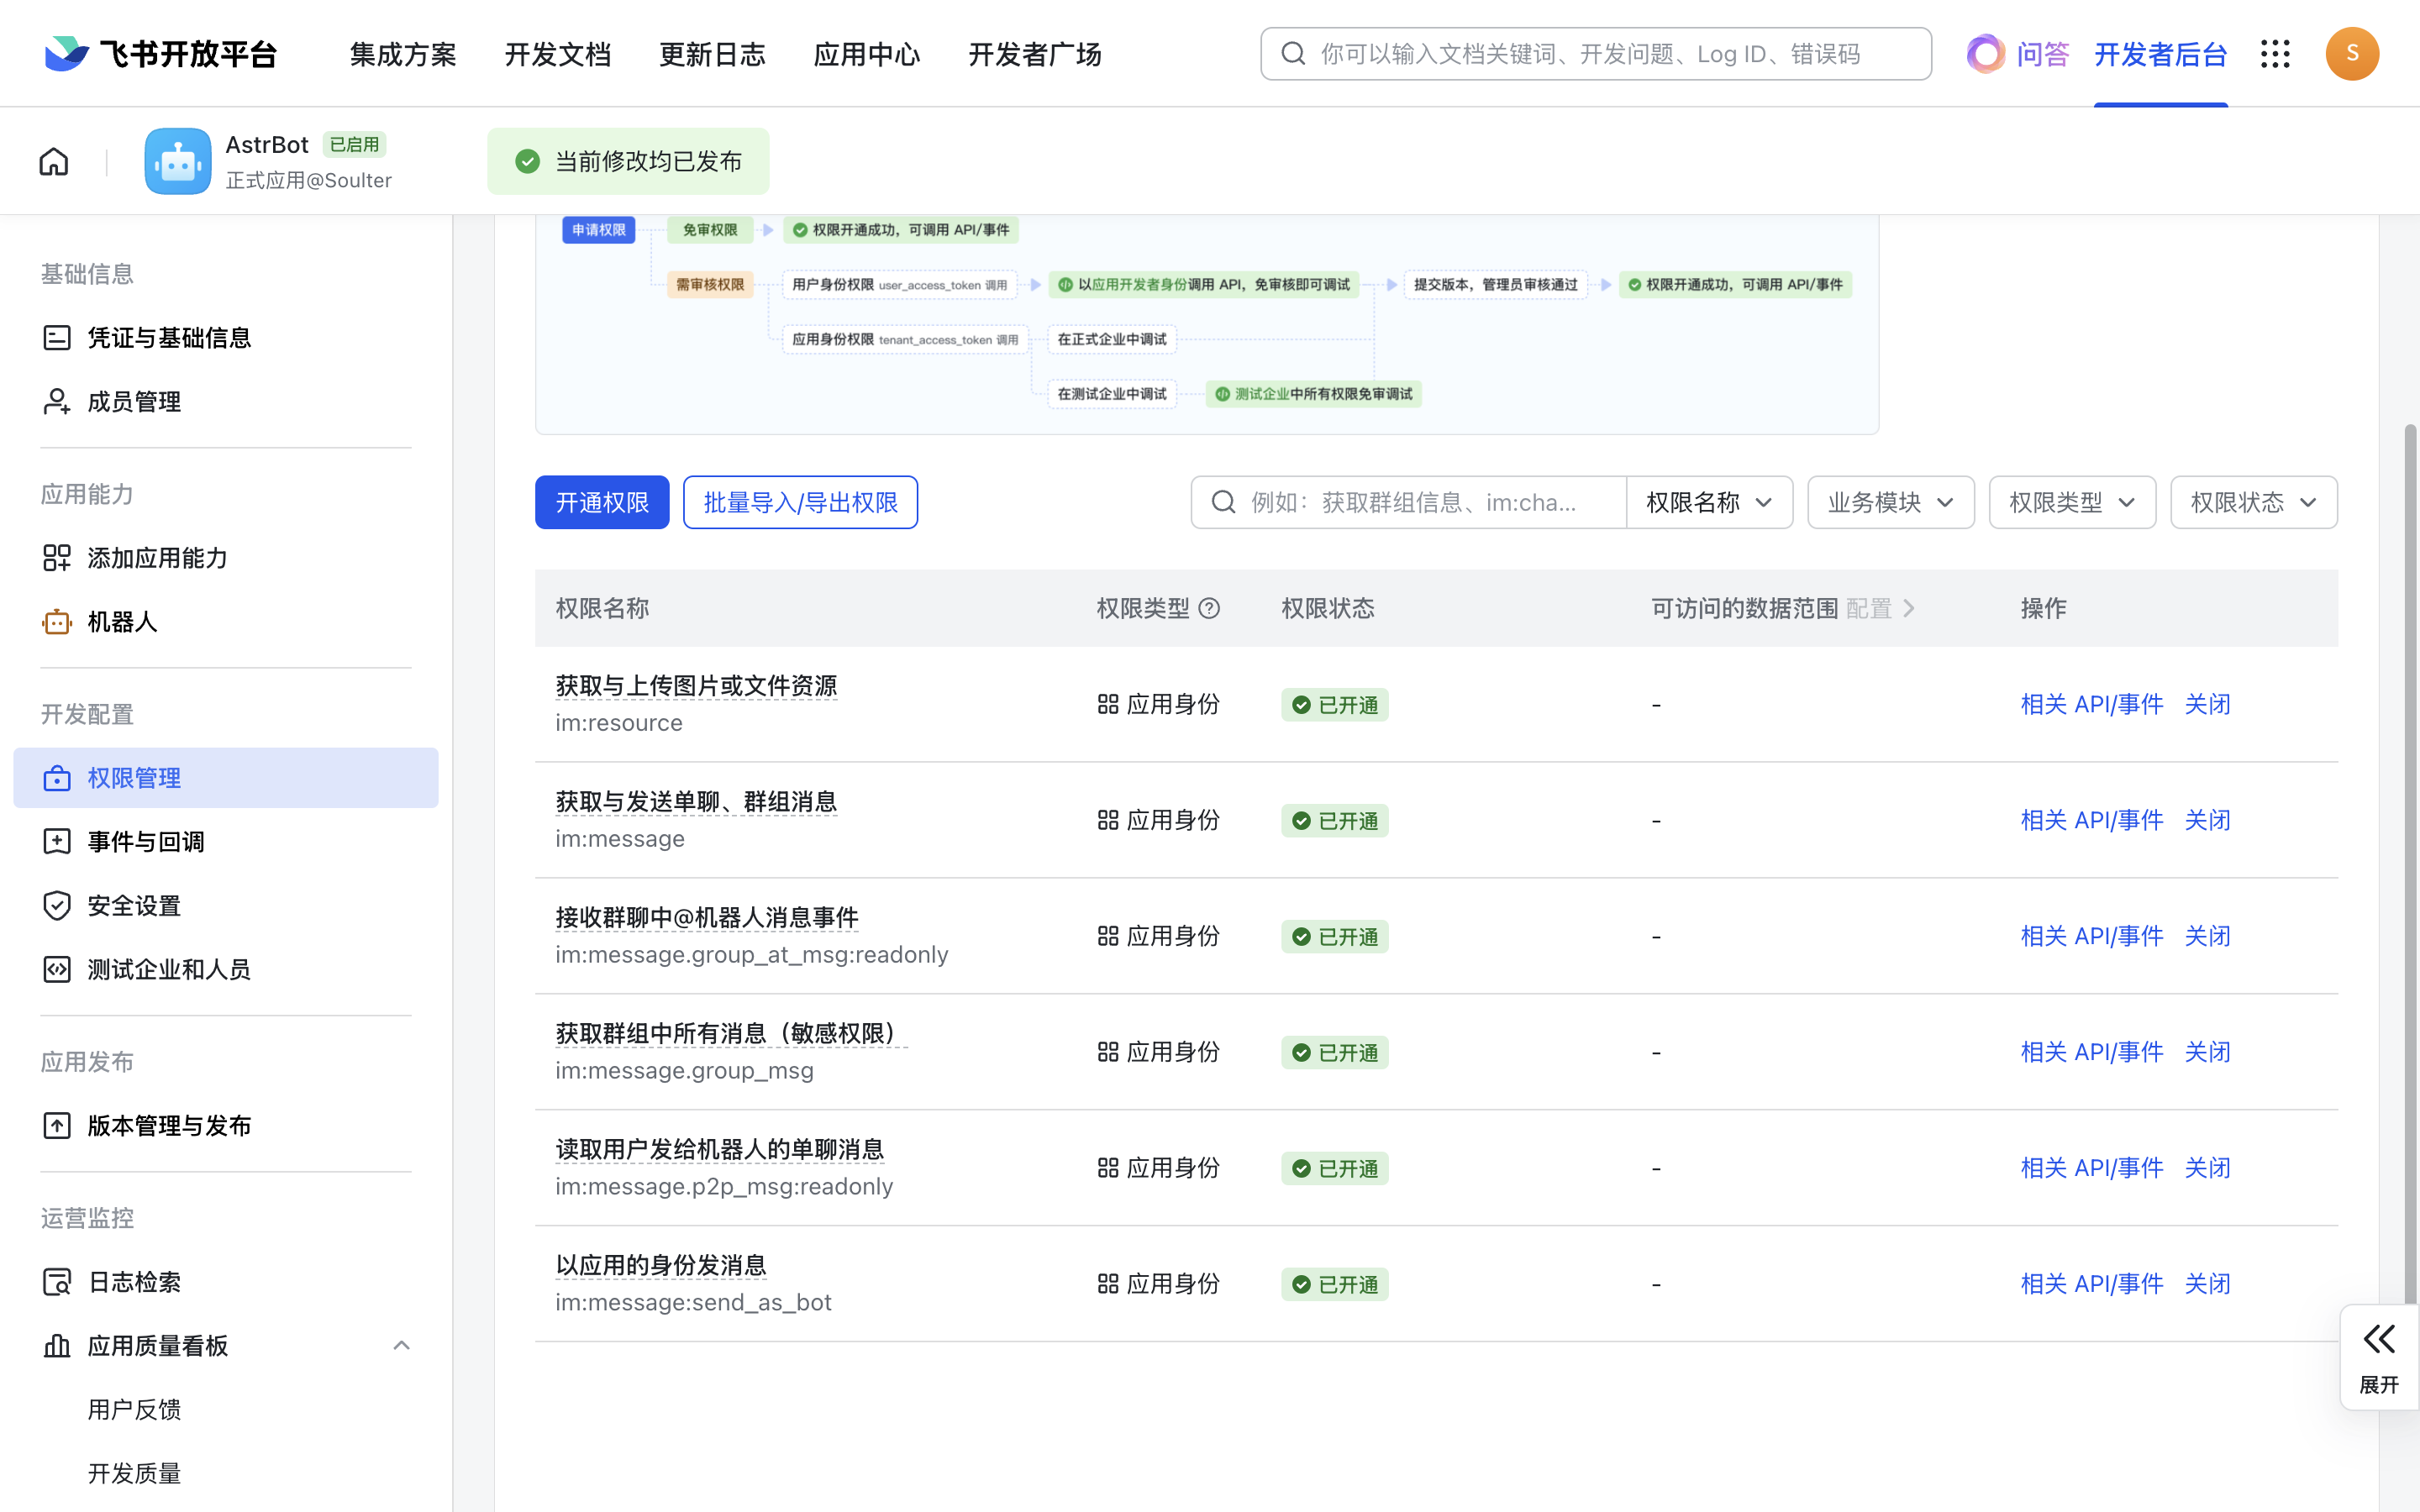
Next, click “Permission Management,” click “Enable Permissions,” and enterim:message:send,im:message,im:message:send_as_bot. Add the filtered permissions.
Enter im:resource:upload,im:resource again to enable permissions related to uploading images.
The final set of enabled permissions is as follows:
Create a version
Create a version.
Add the bot to a group
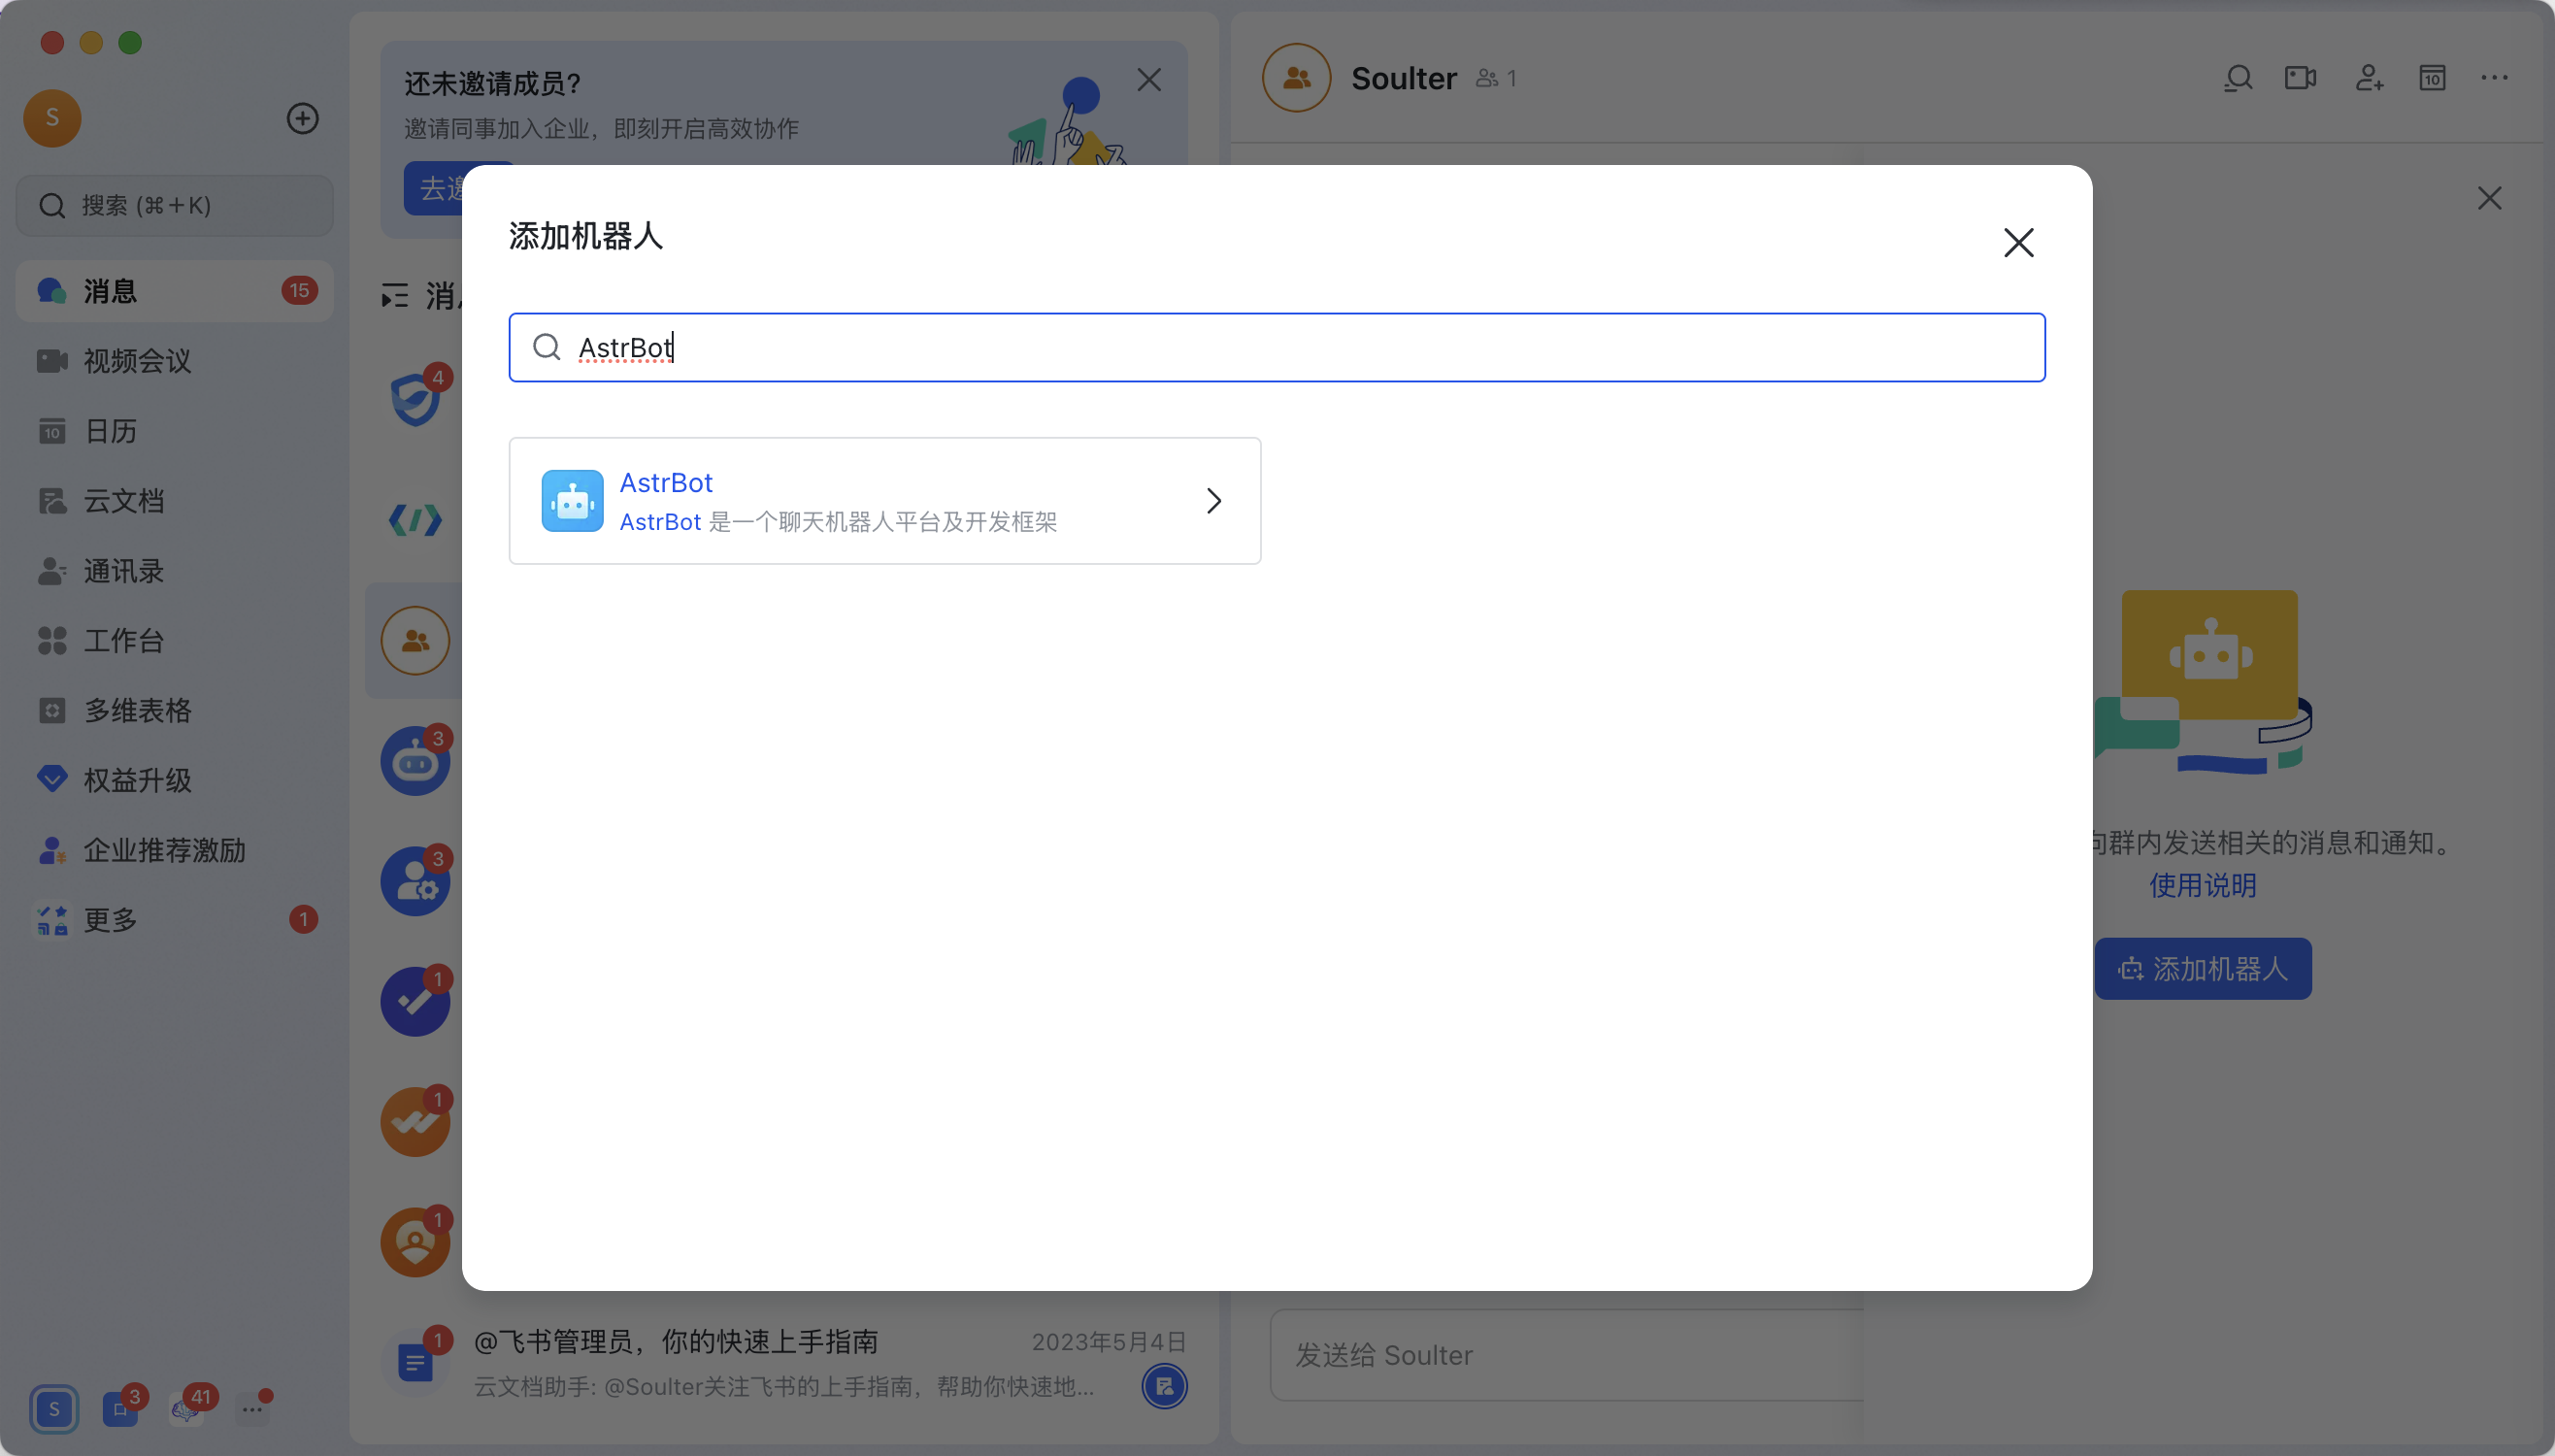
Open the Feishu app (you cannot add bots in the web version of Feishu), enter a group chat, click the button at the top-right → “Group Bots” → “Add Bot”. Search for the name of the bot you just created. For example, in this tutorial we created theAstrBot bot:
🎉 All done
Send a test messagehi in the group, and the bot will respond.