1 About cherry studio
Developers can visit the Github project link to star ⭐️ the open-source project to support it.
🚀 Cherry Studio integrates mainstream LLM cloud services and AI web services, and it also supports local model execution.
🌟 Cherry Studio provides personalized features such as full Markdown rendering, agent creation, translation, file upload, and multimodal conversations, with a user-friendly interface and flexible theme options, aiming to provide a comprehensive and efficient AI interaction experience.
1.1 Download cherry studio
1.2 Installation guide
2. Configuring SiliconFlow model services
2.1 Click on the settings icon in the bottom left corner and select SiliconFlow in the model services.
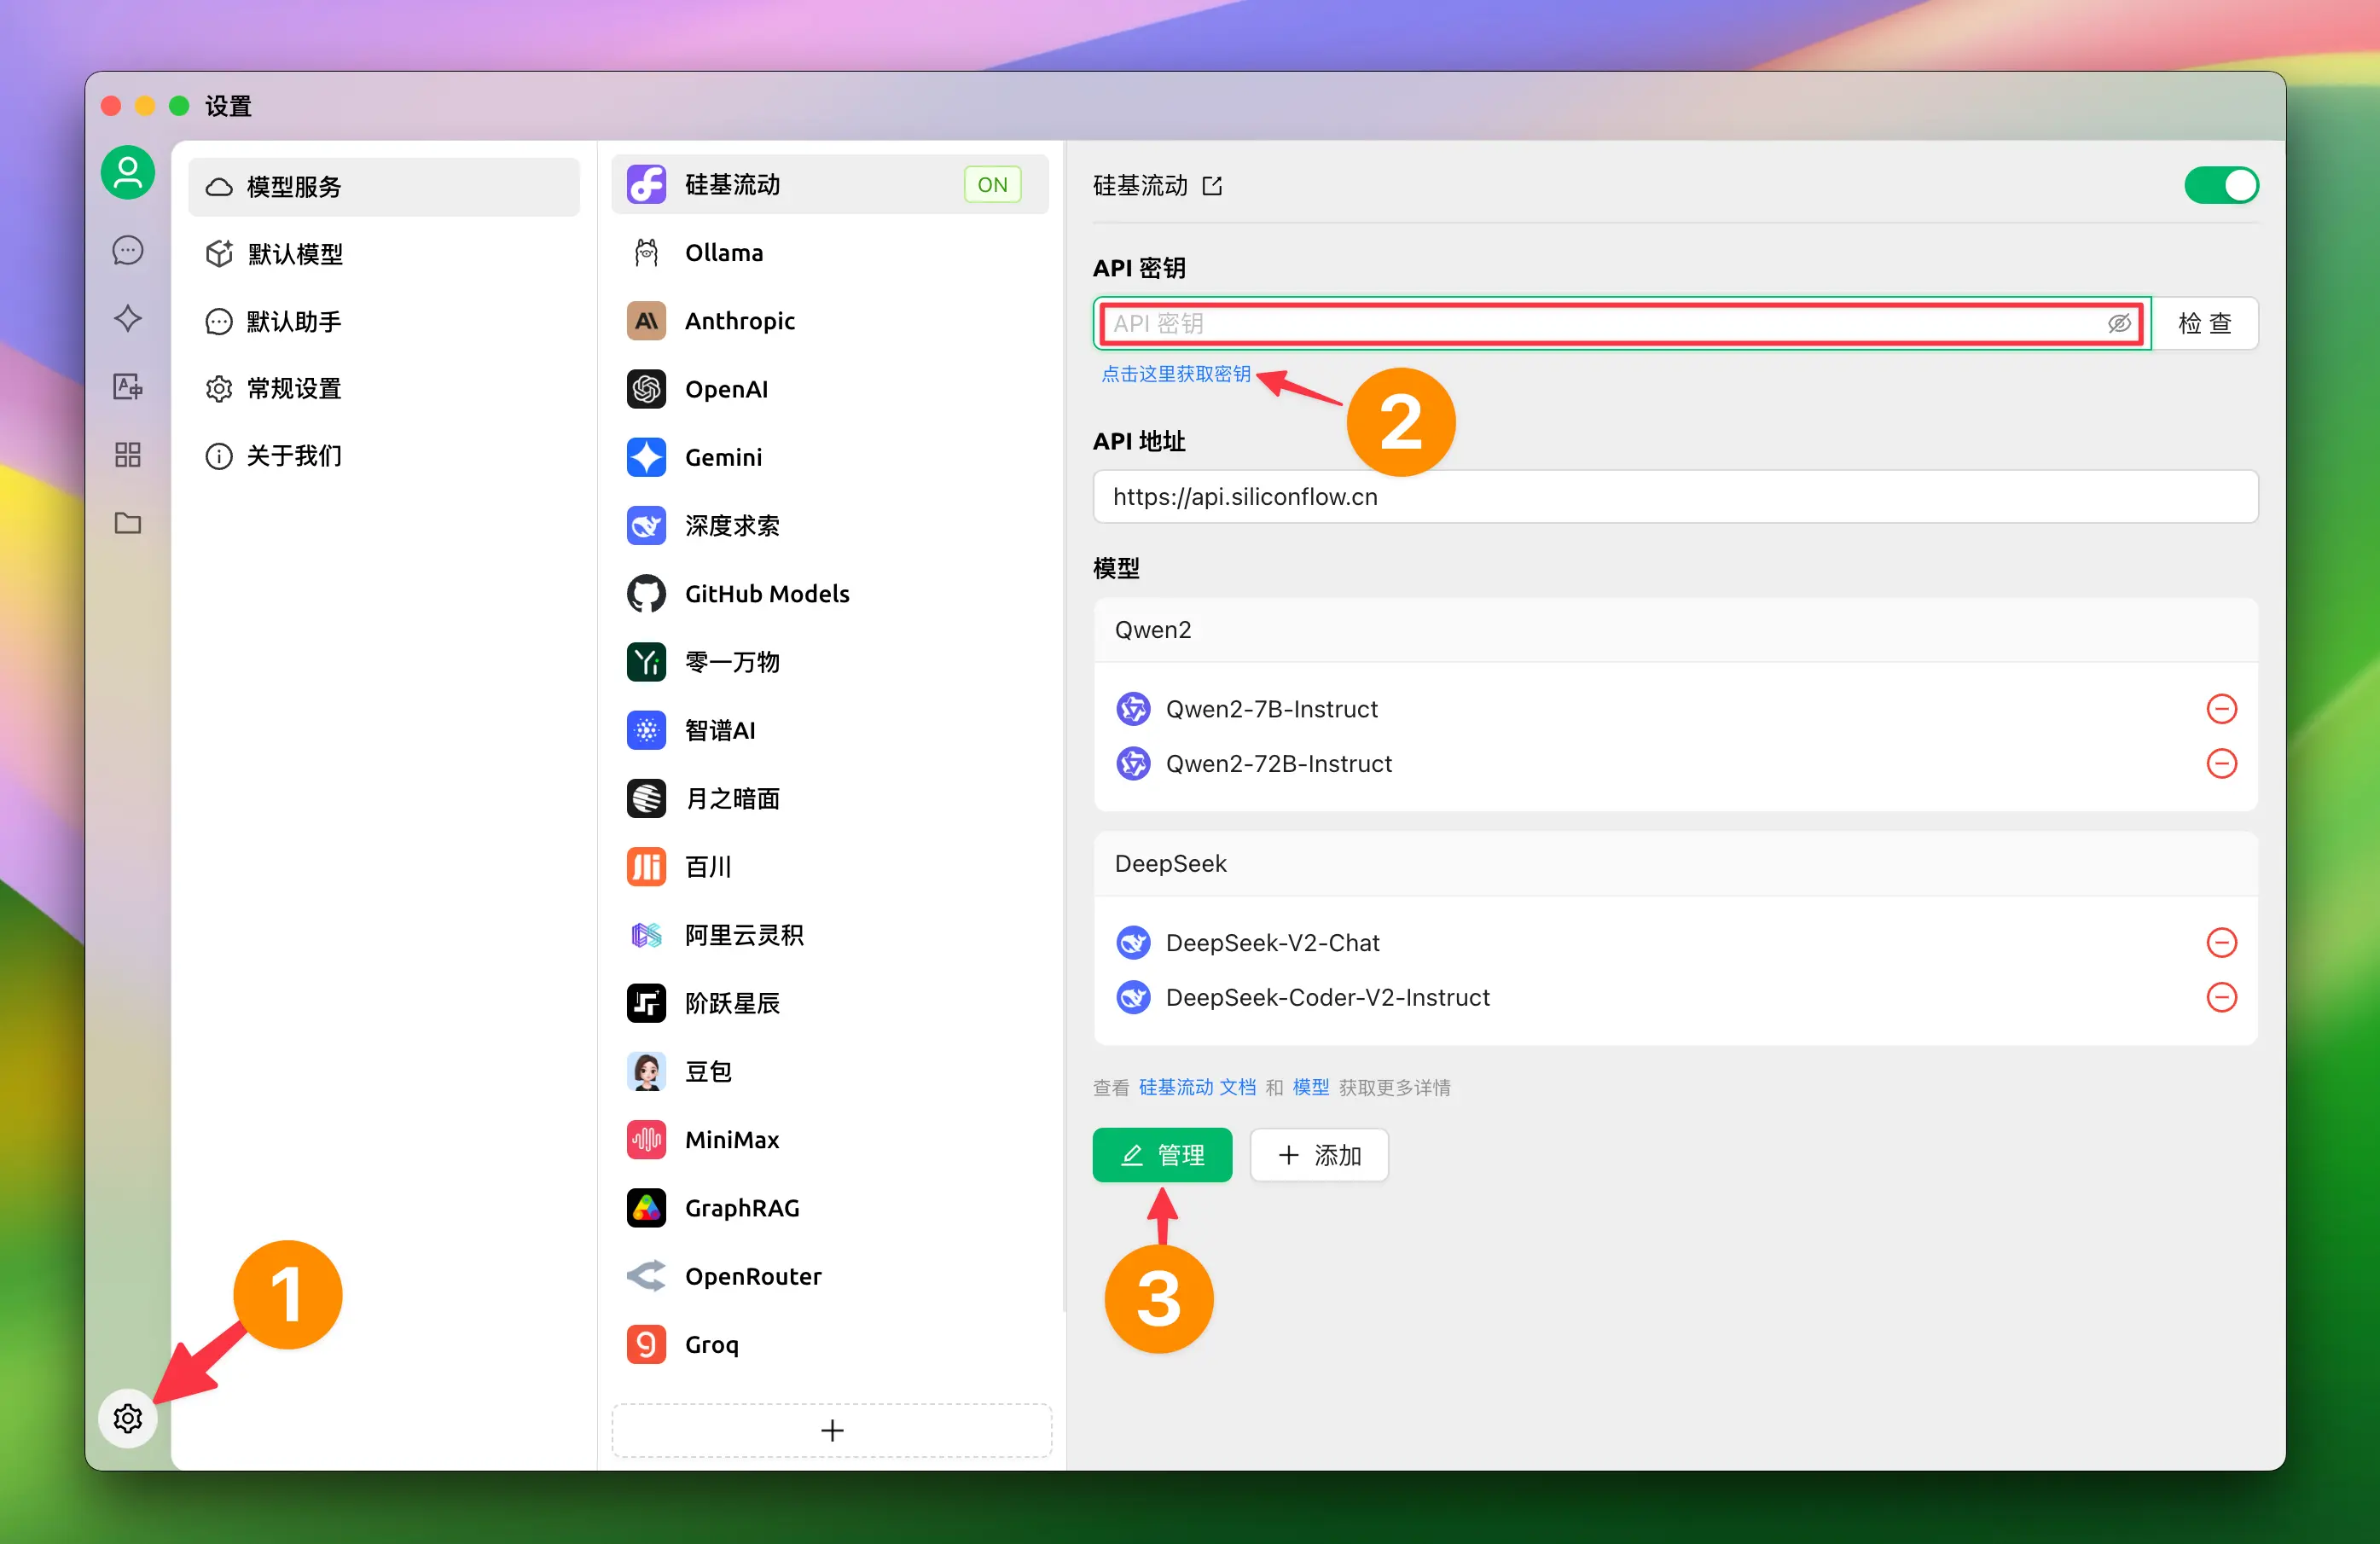
2.2 Click the link to get the SiliconFlow API key
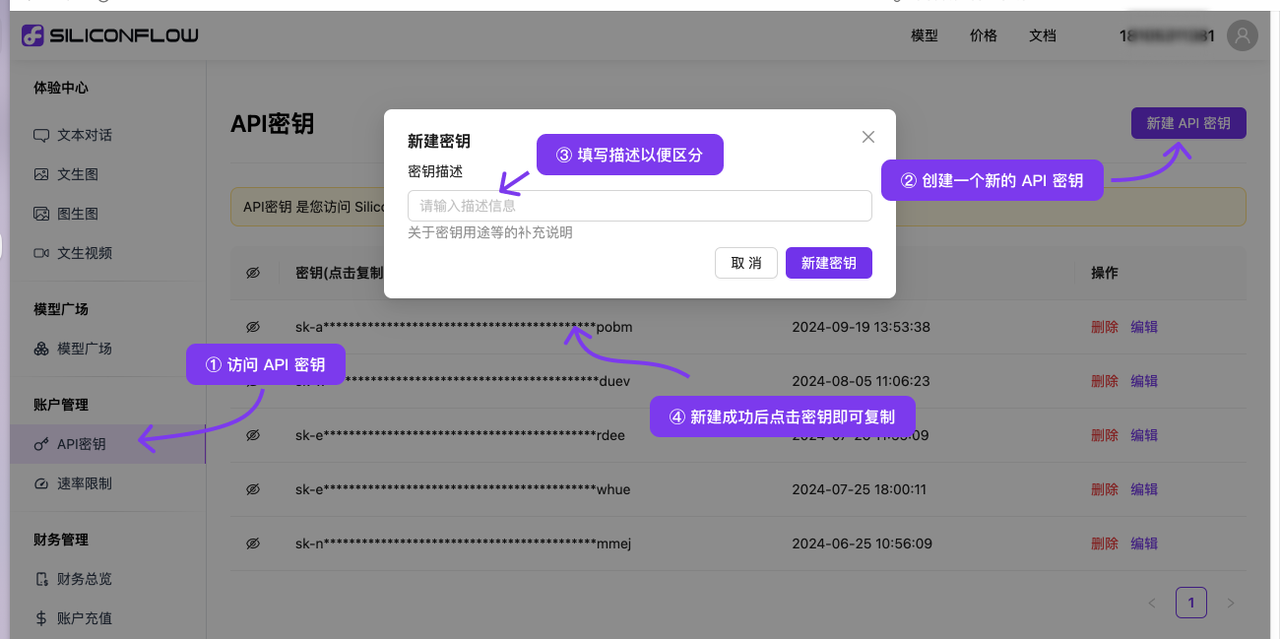
- Log in to SiliconFlow (if you haven’t registered, you will be automatically registered upon first login)
- Go to the API Keys to create or copy an existing key
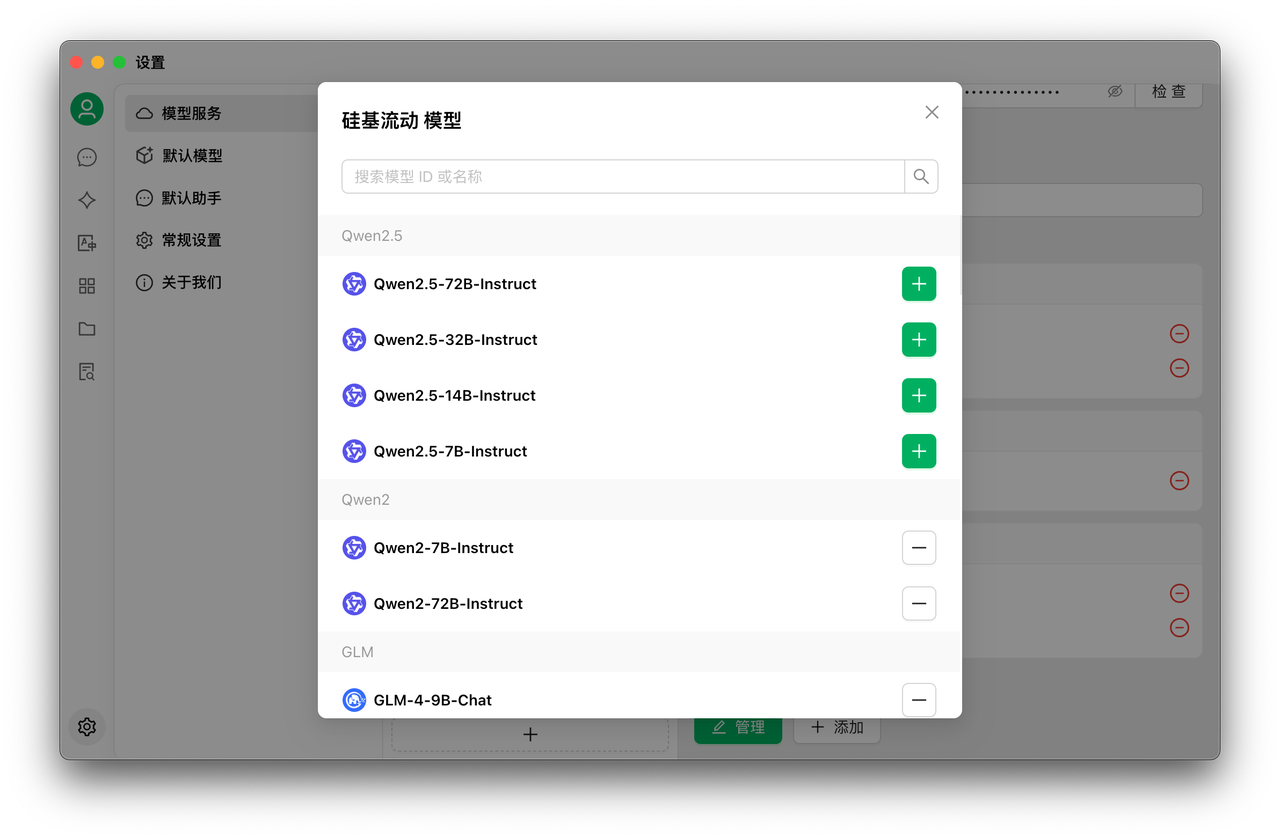
2.3 Click to add a model
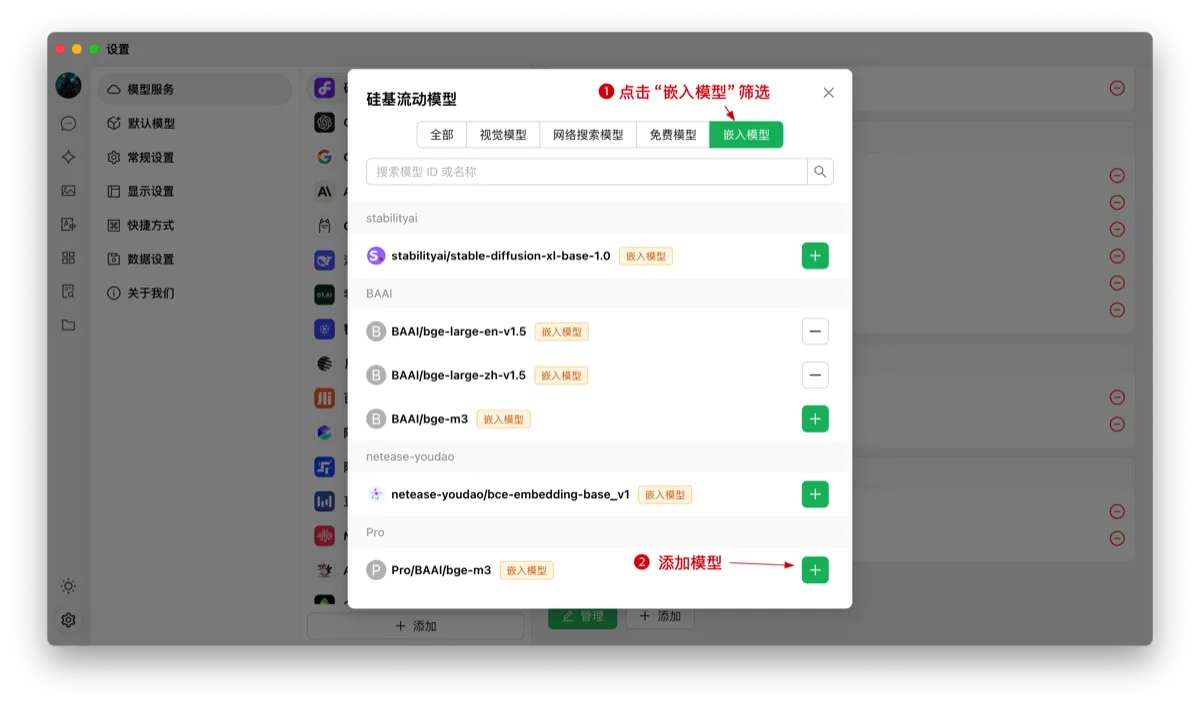
2.4 Add an embedded model
- Search for models in the model management service, you can quickly filter by clicking “Embedded Models”;
- Find the desired model and add it to your models.
3. Using model services
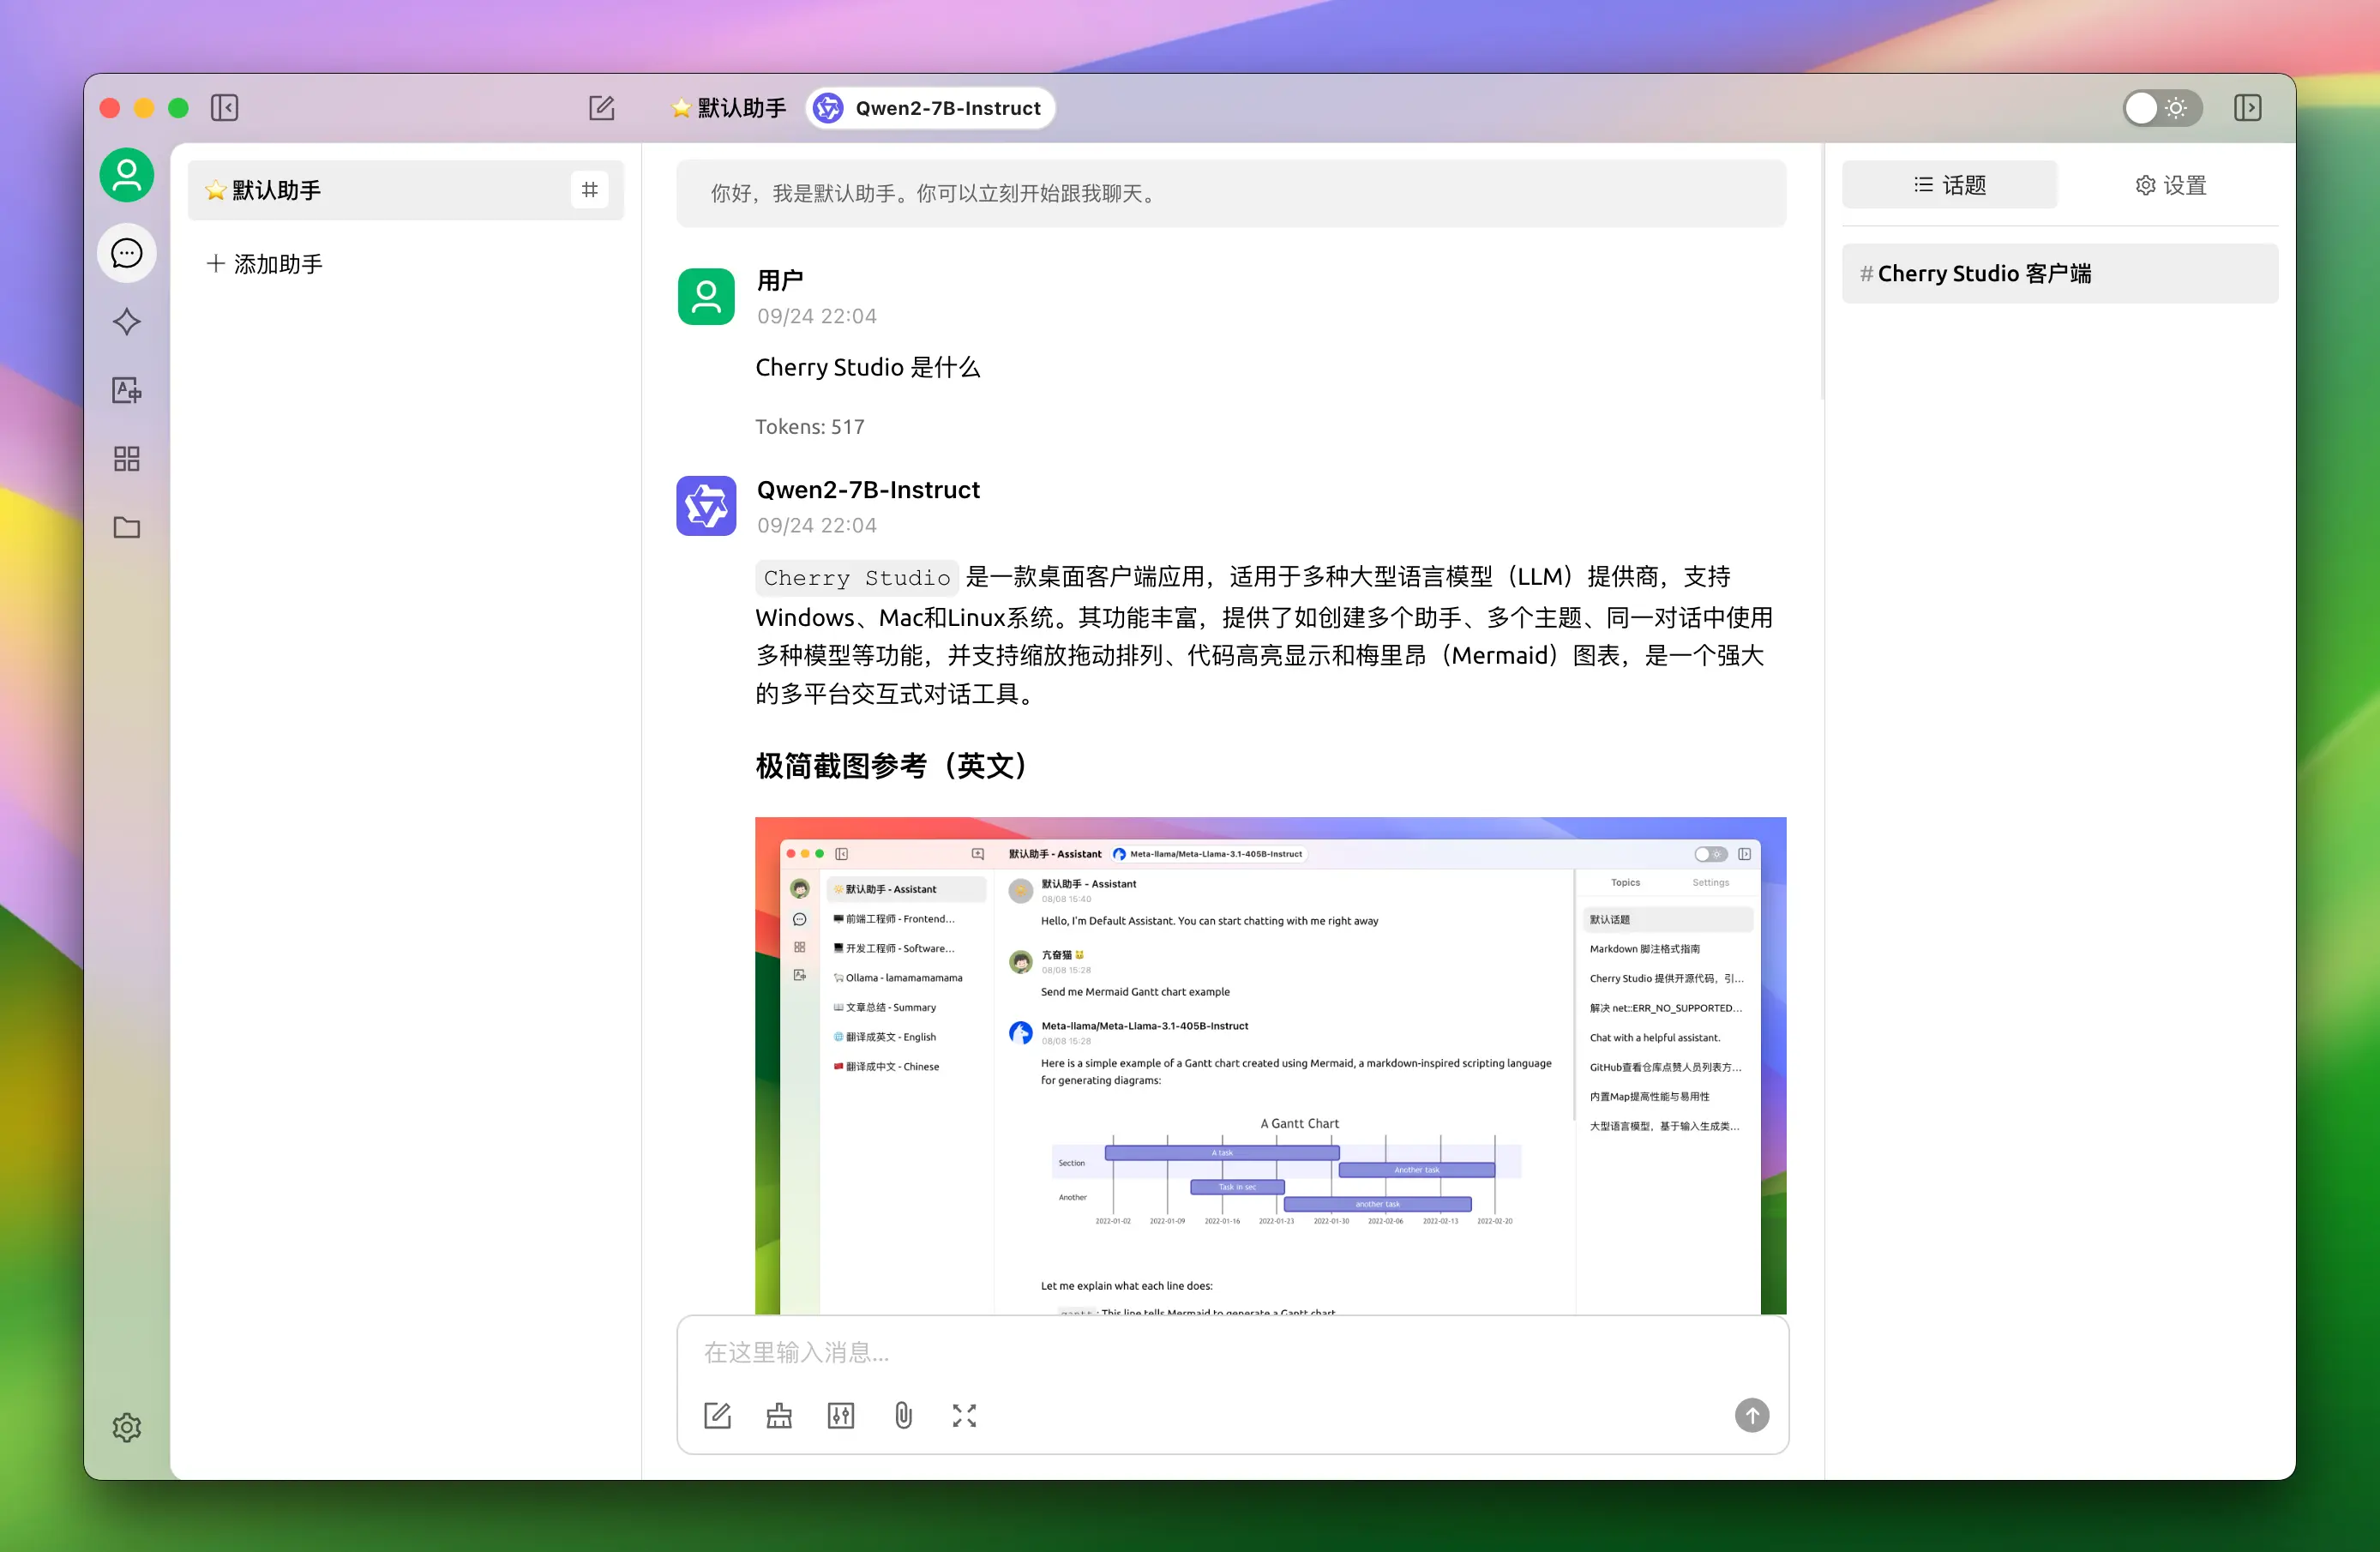
3.1 Chat with language model services
- Click the “Conversation” button in the left menu
- Enter text in the input box to start chatting
- You can switch models by selecting the model name from the top menu
3.2 Create and use a knowledge base with embedded models
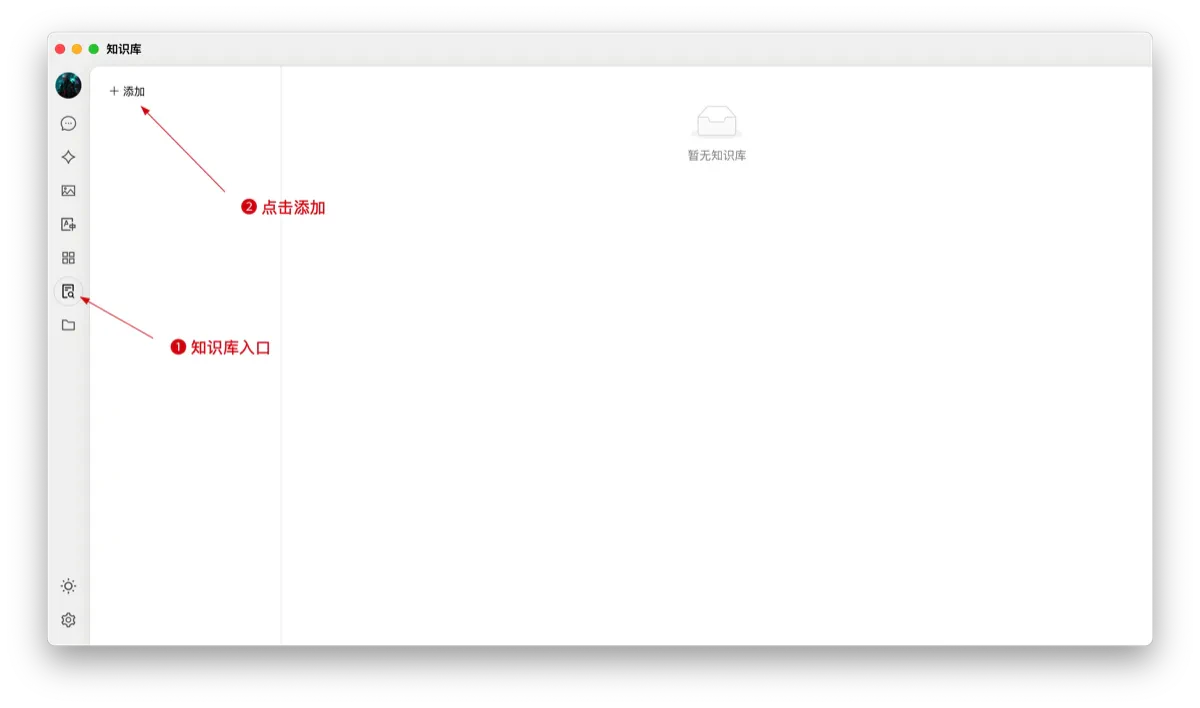
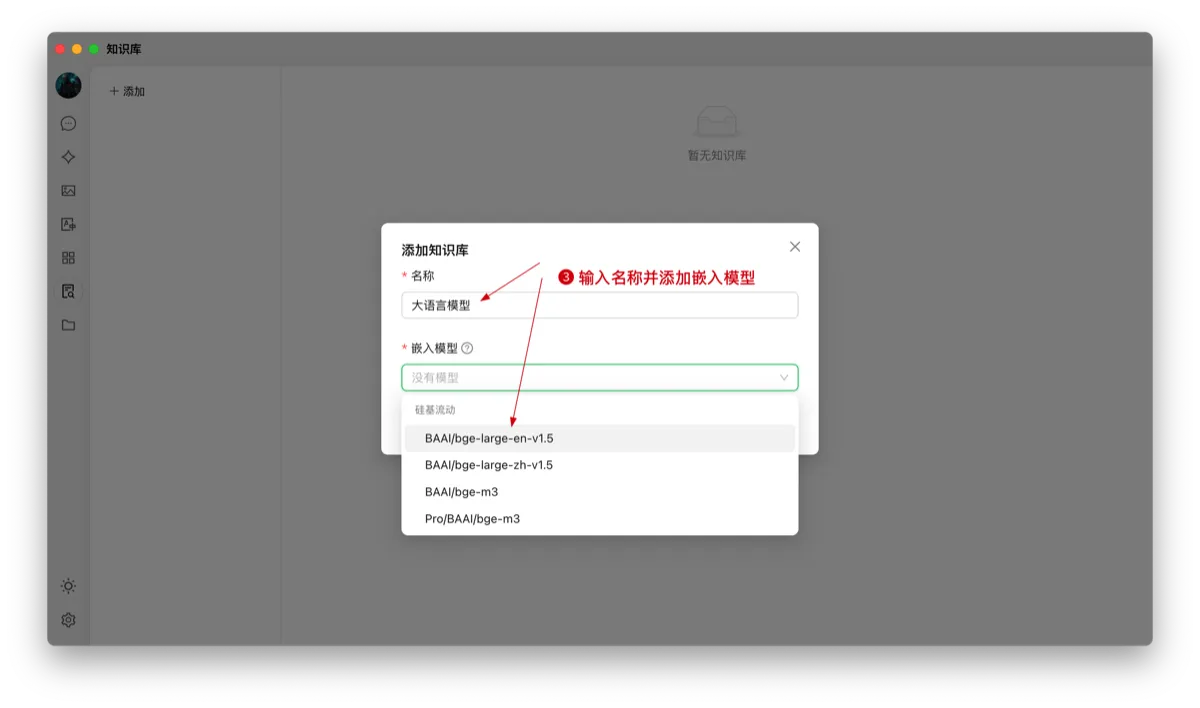
3.2.1 Create a knowledge base
- Knowledge Base Entry: Click the Knowledge Base icon in the left toolbar of Cherry Studio to enter the management page;
- Add a Knowledge Base: Click “Add” to start creating a knowledge base;
- Name: Enter the name of the knowledge base and add an embedded model, for example, bge-m3, to complete the creation.
3.2.2 Add files and vectorize
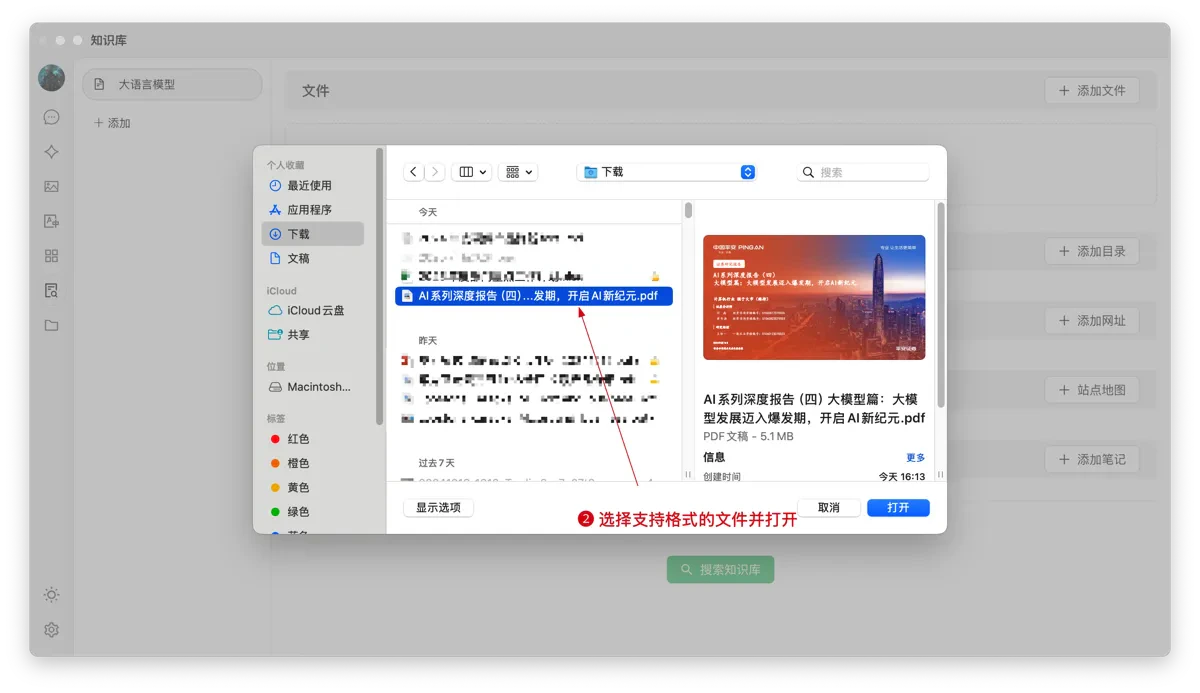
- Add Files: Click the “Add Files” button to open the file selection dialog;
- Select Files: Choose supported file formats such as pdf, docx, pptx, xlsx, txt, md, mdx, and open them;
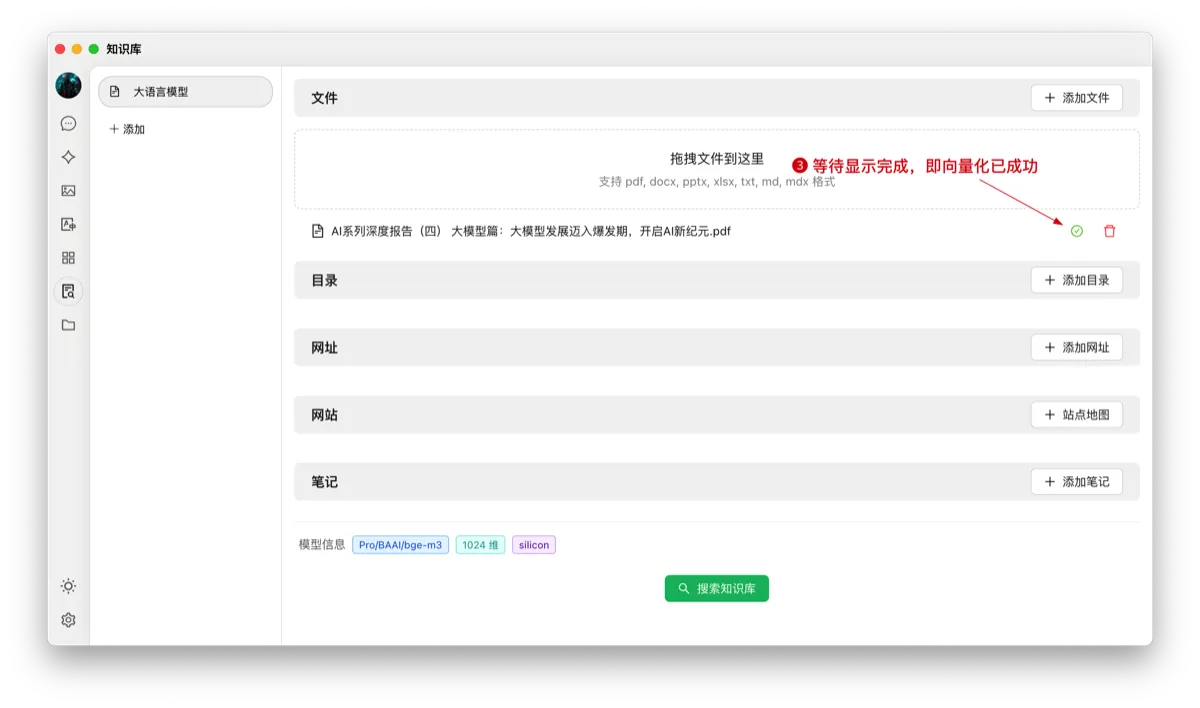
- Vectorize: The system will automatically perform vectorization. When the process is complete (indicated by a green checkmark), vectorization is finished.
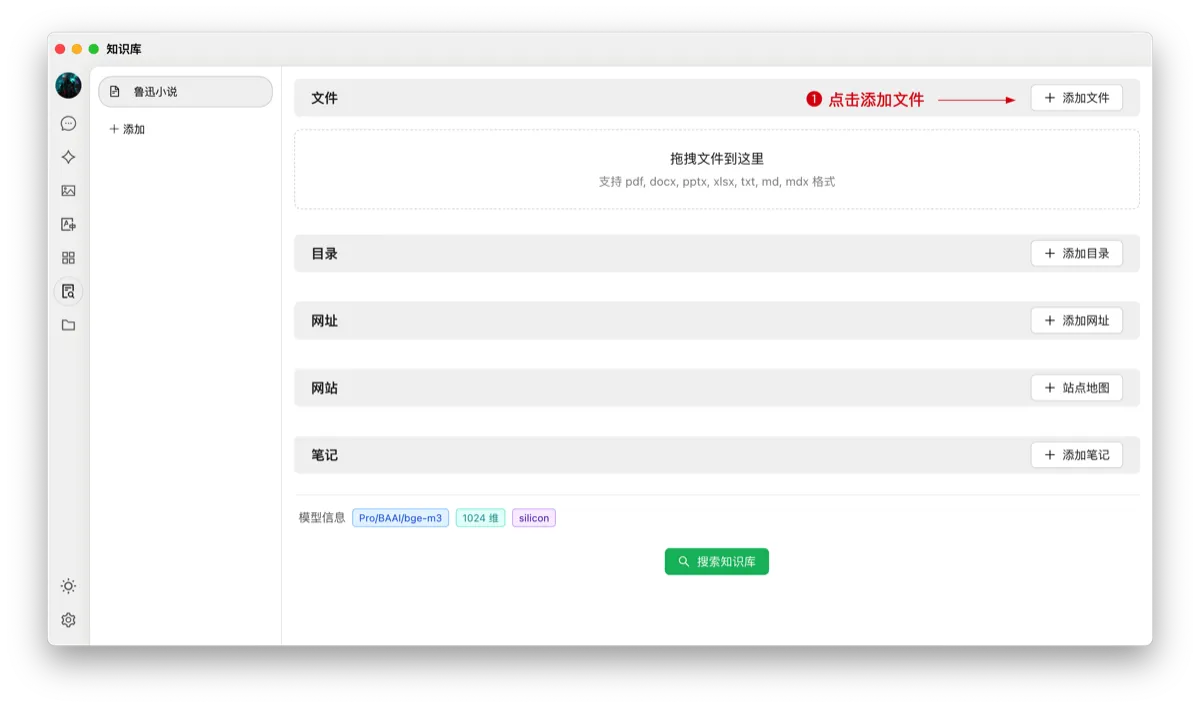
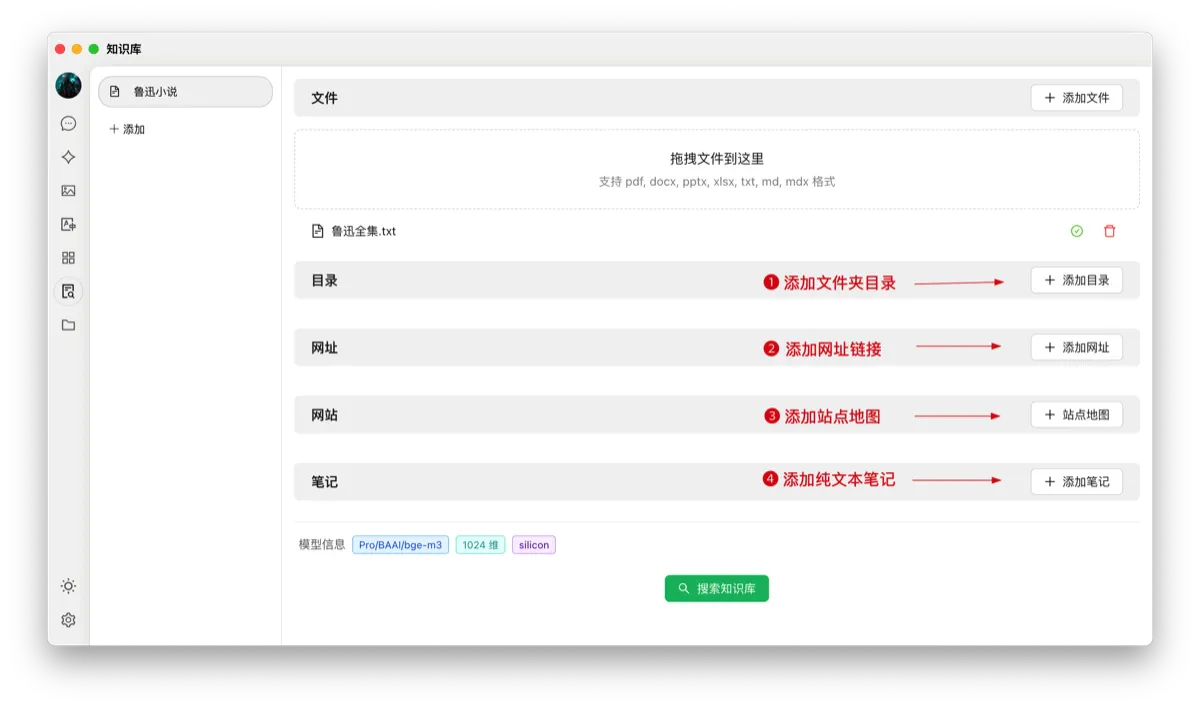
3.2.3 Add data from multiple sources
Cherry Studio supports adding data in multiple ways:- Folder directory: You can add an entire folder directory, and files in that directory with supported formats will be automatically vectorized;
- URL link: Support URL links, such as https://docs.siliconflow.cn/introduction;
- Sitemap: Support XML format sitemaps, such as https://docs.siliconflow.cn/sitemap.xml;
- Plain text notes: Support entering custom content in plain text.
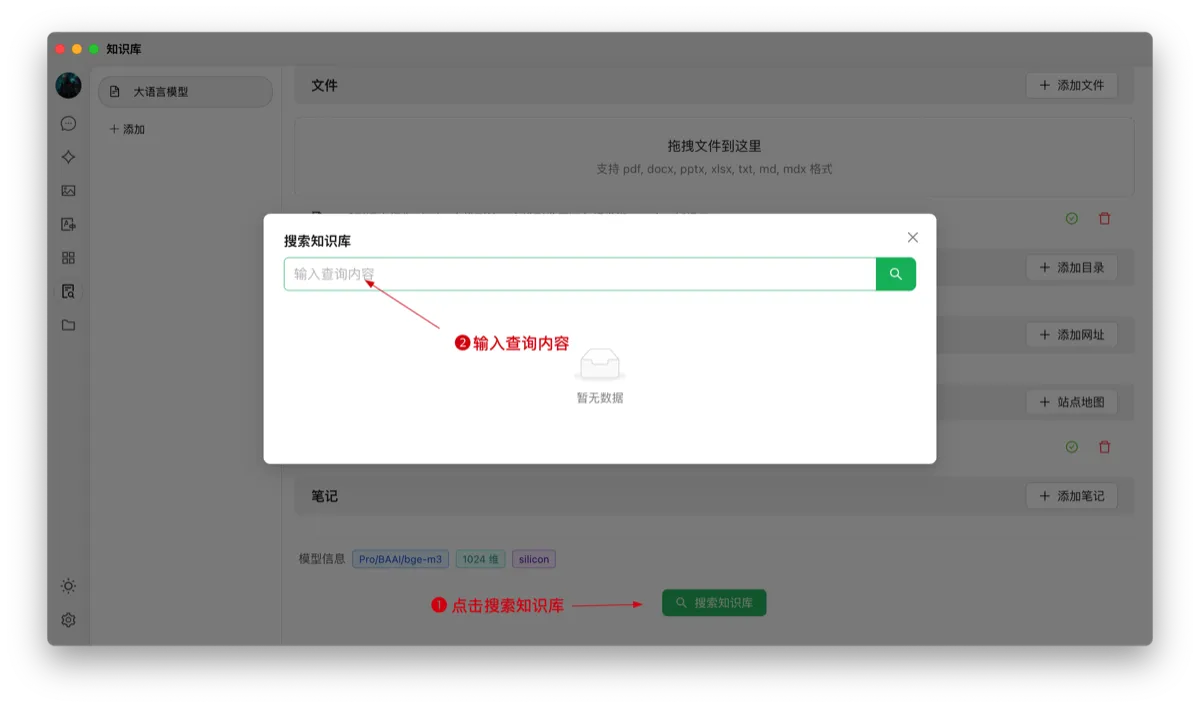
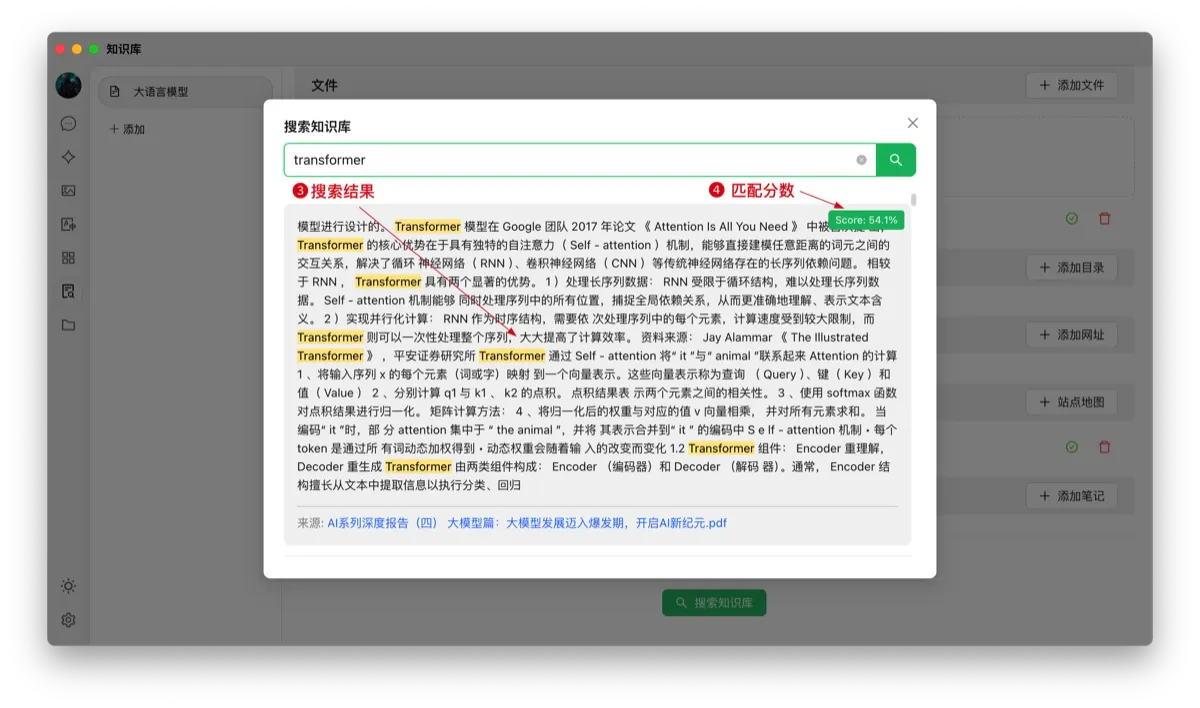
3.2.4 Search the knowledge base
After vectorizing the files and other materials, you can perform queries:- Click the “Search Knowledge Base” button at the bottom of the page;
- Enter the query content;
- Present the search results;
- Display the matching score for each result.
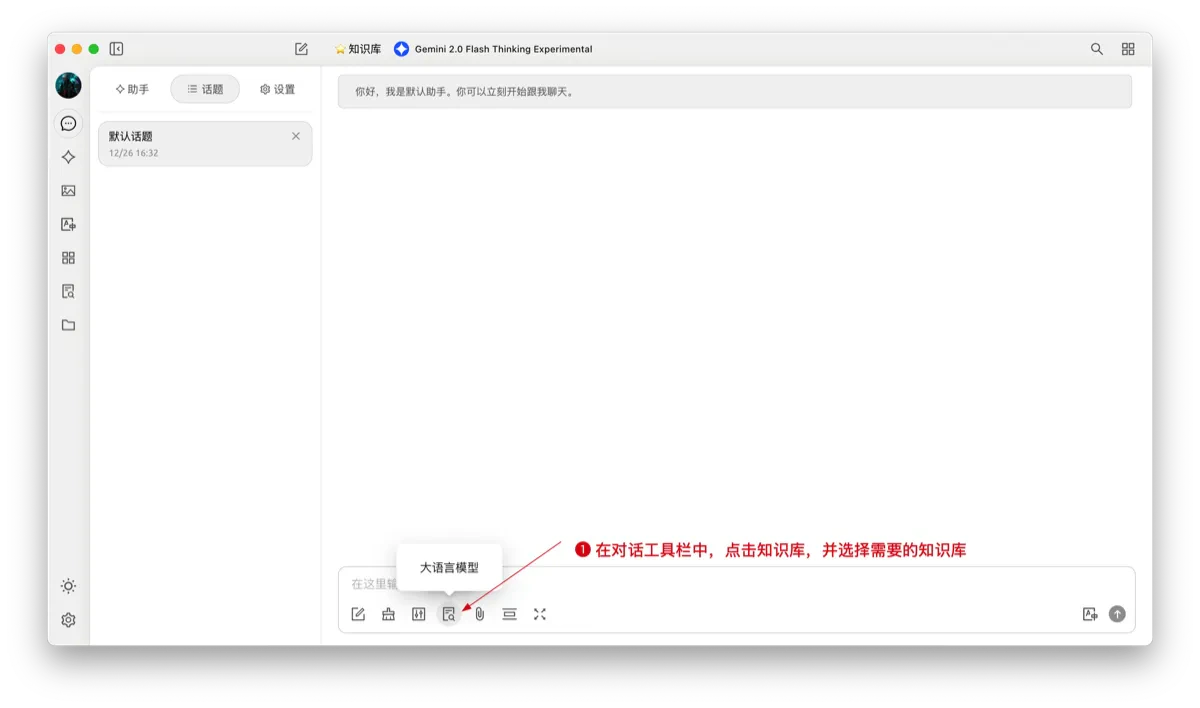
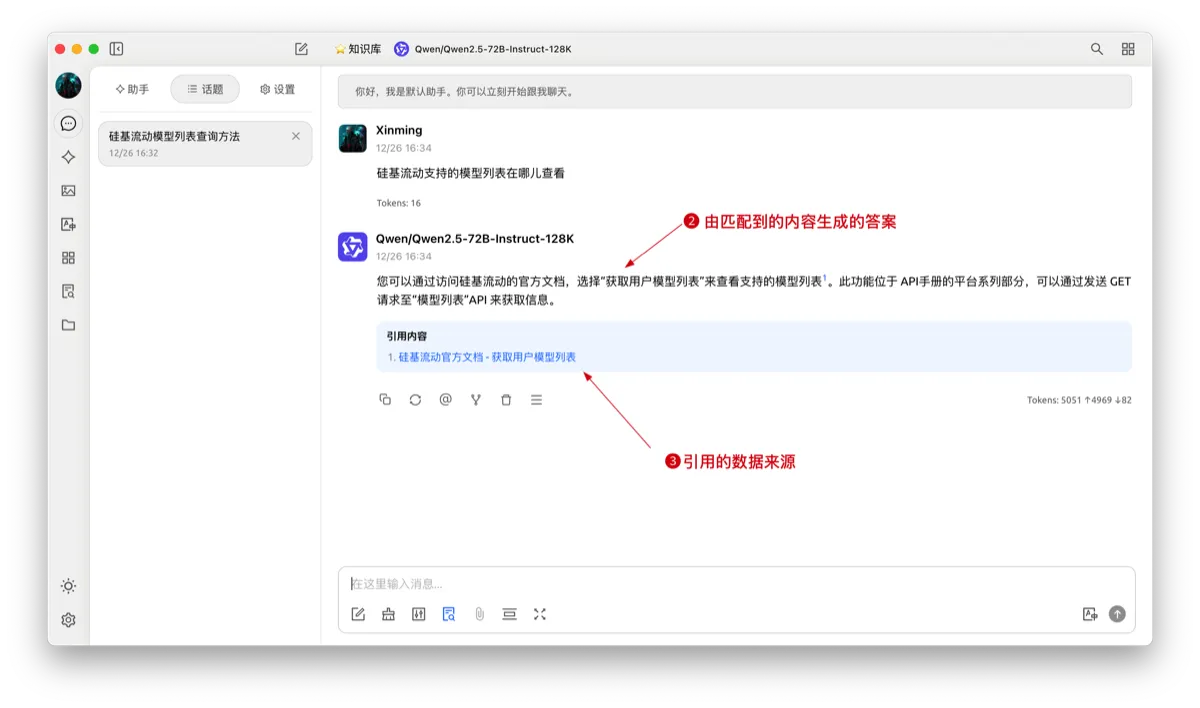
3.2.5 Reference the knowledge base in conversations to generate responses
- Create a new topic in the conversation toolbar, and the list of created knowledge bases will expand. Select the knowledge base you want to reference;
- Input and send a question, and the model will return an answer generated from the search results;
- At the same time, the source of the referenced data will be attached below the answer, allowing for quick access to the source files.