> ## Documentation Index
> Fetch the complete documentation index at: https://docs.siliconflow.cn/llms.txt
> Use this file to discover all available pages before exploring further.
# LangBot
> 更新日期:2025年7月16日
## 关于 LangBot
[**LangBot**](https://langbot.app) 是一个开源的即时通信机器人平台,支持接入 **飞书、钉钉、QQ、微信、Discord、Telegram 等多种消息平台**,帮助用户直接在这些平台内进行任务处理或作为业务组成部分。
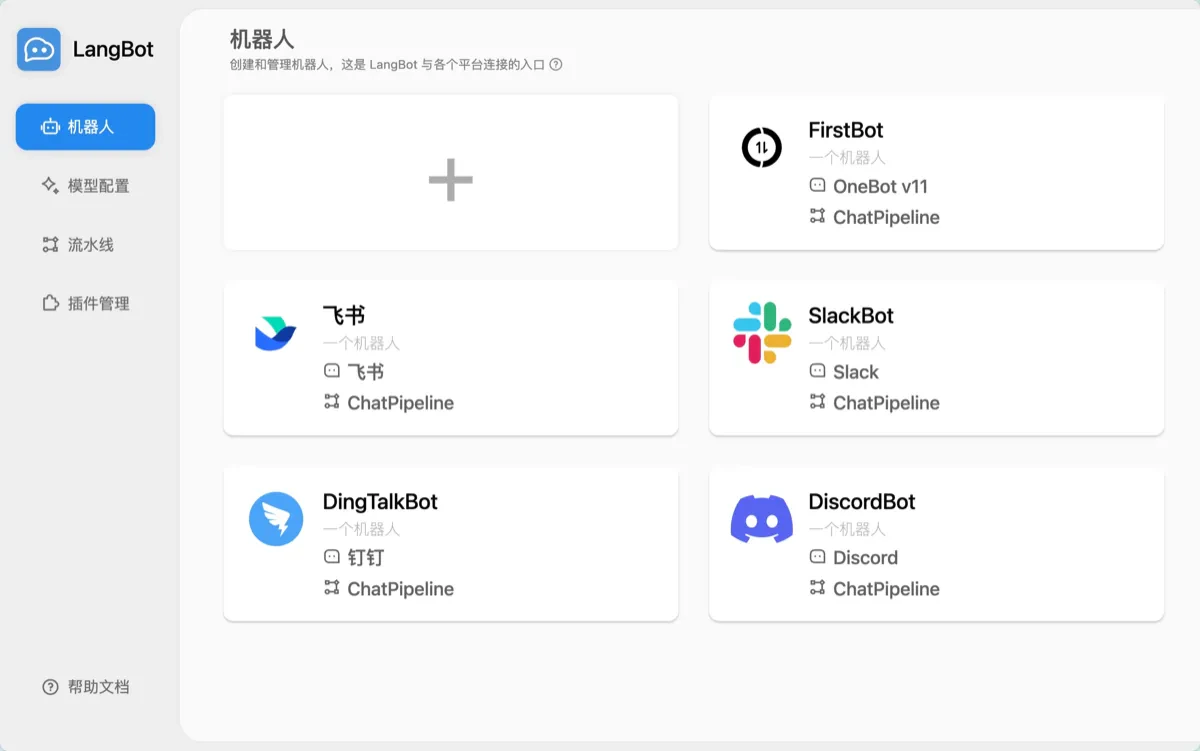 结合 [**SiliconFlow**](https://siliconflow.cn/zh-cn/siliconcloud) 提供的大模型 API 服务,LangBot 可以接入多种主流开源大模型,用户可根据不同场景需求选择合适的模型。以下为完整的配置教程,简单几步即可拥有专属智能助手。
## 配置教程
### 第一步:获取硅基流动 API Key
#### 获取 API Key
1、注册并登录 [硅基流动](https://cloud.siliconflow.cn/)。
2、进入`API 密钥` 页面,生成 API 密钥。
#### 获取模型信息
访问 `模型广场` 查看可用模型及详细参数。
### 第二步:部署并配置 LangBot
#### 使用 Docker 部署 LangBot
> 更多部署方式可查看[文档](https://docs.langbot.app/zh/insight/guide.html)
确保已安装 Git 和 Docker。
```bash theme={null}
git clone https://github.com/langbot-app/LangBot
cd LangBot
docker compose up -d
```
> 如果在中国大陆使用,可将 `docker-compose.yaml` 中的镜像替换为:
```
docker.langbot.app/langbot-public/rockchin/langbot:latest
```
#### 访问 WebUI
启动后访问:
```
http://127.0.0.1:5300
```
首次运行会提示创建配置文件,请根据提示完成初始化。
#### 配置对话模型
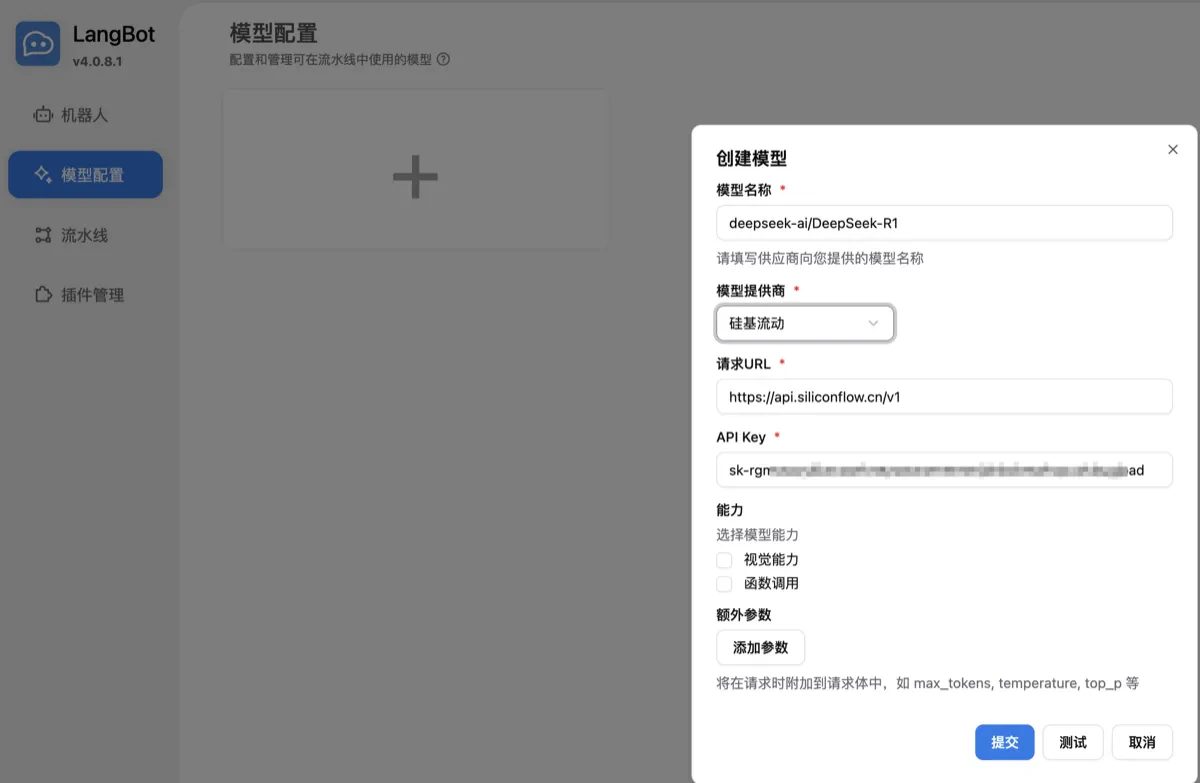
1. 登录 WebUI,进入 **模型配置** 页面。
2. 添加新模型,填写如下信息:
| 字段 | 内容 |
| ------- | ---------------------------- |
| 模型名称 | 根据需要选择的模型名称,可以在硅基流动的模型广场页面获取 |
| 模型提供商 | 选择`硅基流动` |
| API Key | 从`硅基流动`-`API 密钥`页面获取的密钥 |
| 模型能力 | 根据硅基流动页面描述勾选 |
结合 [**SiliconFlow**](https://siliconflow.cn/zh-cn/siliconcloud) 提供的大模型 API 服务,LangBot 可以接入多种主流开源大模型,用户可根据不同场景需求选择合适的模型。以下为完整的配置教程,简单几步即可拥有专属智能助手。
## 配置教程
### 第一步:获取硅基流动 API Key
#### 获取 API Key
1、注册并登录 [硅基流动](https://cloud.siliconflow.cn/)。
2、进入`API 密钥` 页面,生成 API 密钥。
#### 获取模型信息
访问 `模型广场` 查看可用模型及详细参数。
### 第二步:部署并配置 LangBot
#### 使用 Docker 部署 LangBot
> 更多部署方式可查看[文档](https://docs.langbot.app/zh/insight/guide.html)
确保已安装 Git 和 Docker。
```bash theme={null}
git clone https://github.com/langbot-app/LangBot
cd LangBot
docker compose up -d
```
> 如果在中国大陆使用,可将 `docker-compose.yaml` 中的镜像替换为:
```
docker.langbot.app/langbot-public/rockchin/langbot:latest
```
#### 访问 WebUI
启动后访问:
```
http://127.0.0.1:5300
```
首次运行会提示创建配置文件,请根据提示完成初始化。
#### 配置对话模型
1. 登录 WebUI,进入 **模型配置** 页面。
2. 添加新模型,填写如下信息:
| 字段 | 内容 |
| ------- | ---------------------------- |
| 模型名称 | 根据需要选择的模型名称,可以在硅基流动的模型广场页面获取 |
| 模型提供商 | 选择`硅基流动` |
| API Key | 从`硅基流动`-`API 密钥`页面获取的密钥 |
| 模型能力 | 根据硅基流动页面描述勾选 |
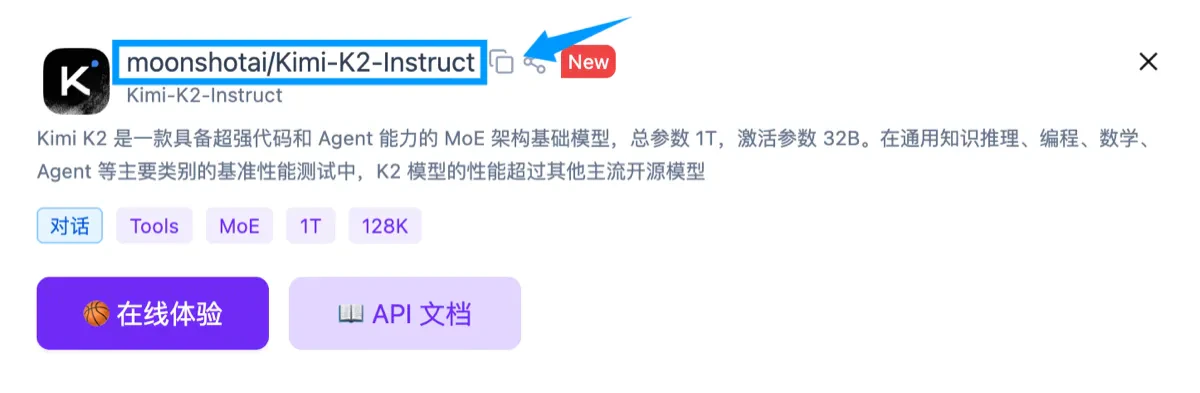 模型名称可在 SiliconFlow 模型详情页标题找到。
 ### 第三步:接入平台(以钉钉为例)
> 企业微信、飞书、Discord、Telegram、QQ、微信 等更多平台,请参考 [LangBot 文档](https://docs.langbot.app/zh/insight/guide.html)
#### 创建钉钉机器人应用
1、登录 [钉钉开发者后台](https://open-dev.dingtalk.com/)
### 第三步:接入平台(以钉钉为例)
> 企业微信、飞书、Discord、Telegram、QQ、微信 等更多平台,请参考 [LangBot 文档](https://docs.langbot.app/zh/insight/guide.html)
#### 创建钉钉机器人应用
1、登录 [钉钉开发者后台](https://open-dev.dingtalk.com/)
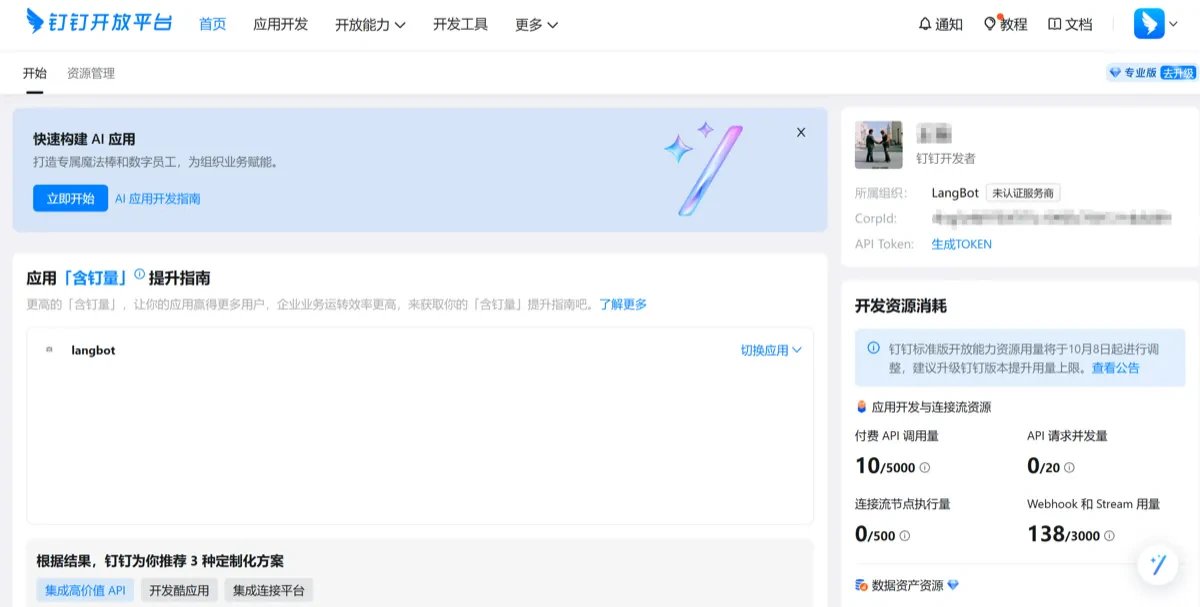 2、进入组织,点击「应用开发」→「创建应用」,填写基本信息。
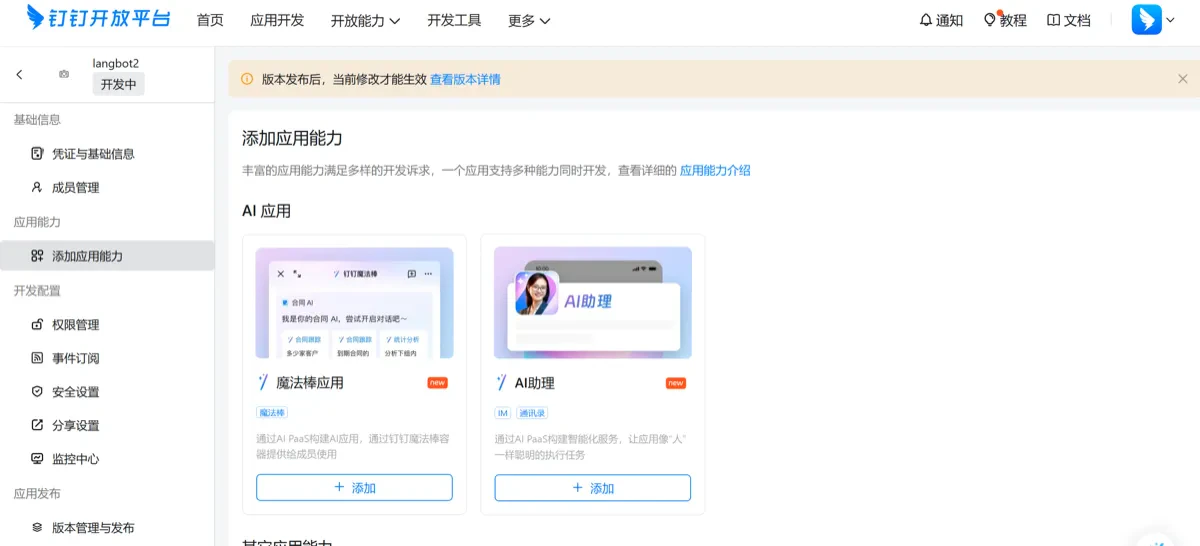
3、添加「机器人」能力,完成基础配置并发布。
2、进入组织,点击「应用开发」→「创建应用」,填写基本信息。
3、添加「机器人」能力,完成基础配置并发布。
 #### 配置机器人
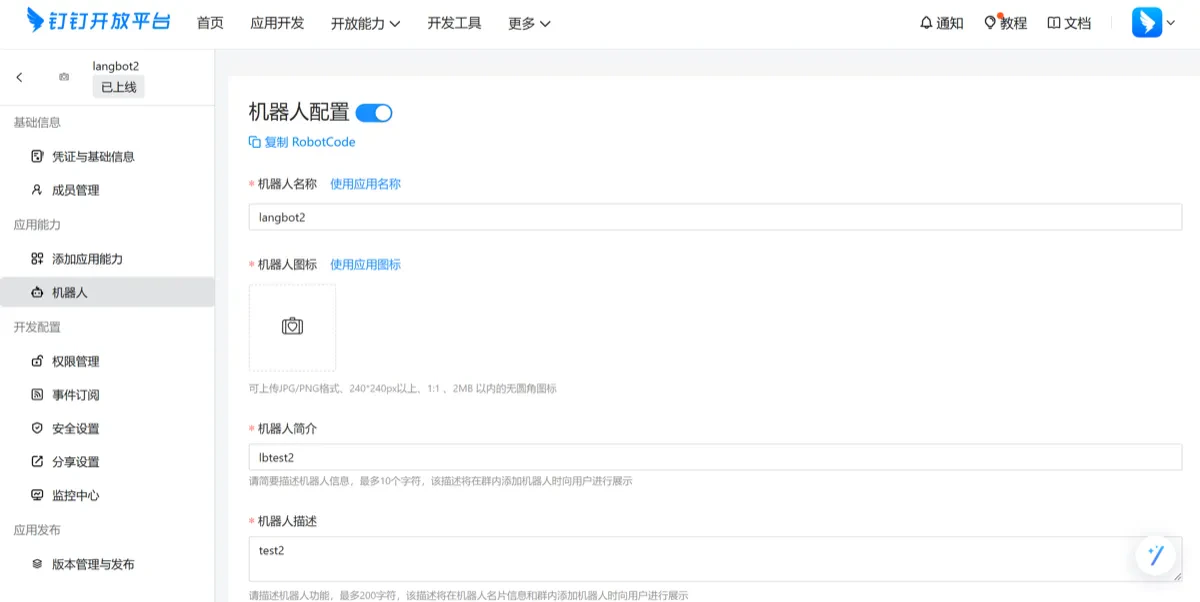
* 在「机器人」选项卡中填写相关信息并发布。
#### 配置机器人
* 在「机器人」选项卡中填写相关信息并发布。
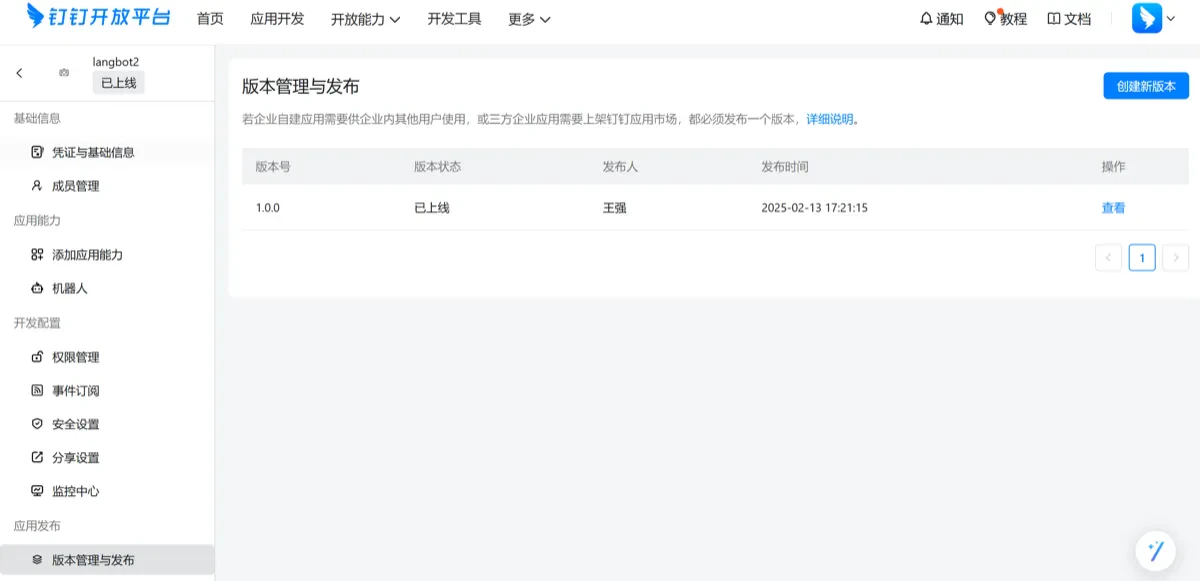
 * 在「版本管理」中配置版本号。
 * 在「事件订阅」中选择 **Stream 模式**,无需公网回调地址。
* 在「凭证与基础信息」中记录:
* Client ID
* Client Secret
* RobotCode
* 机器人名称
#### 配置 LangBot 平台绑定
1、打开 LangBot WebUI,编辑机器人。
* 在「事件订阅」中选择 **Stream 模式**,无需公网回调地址。
* 在「凭证与基础信息」中记录:
* Client ID
* Client Secret
* RobotCode
* 机器人名称
#### 配置 LangBot 平台绑定
1、打开 LangBot WebUI,编辑机器人。
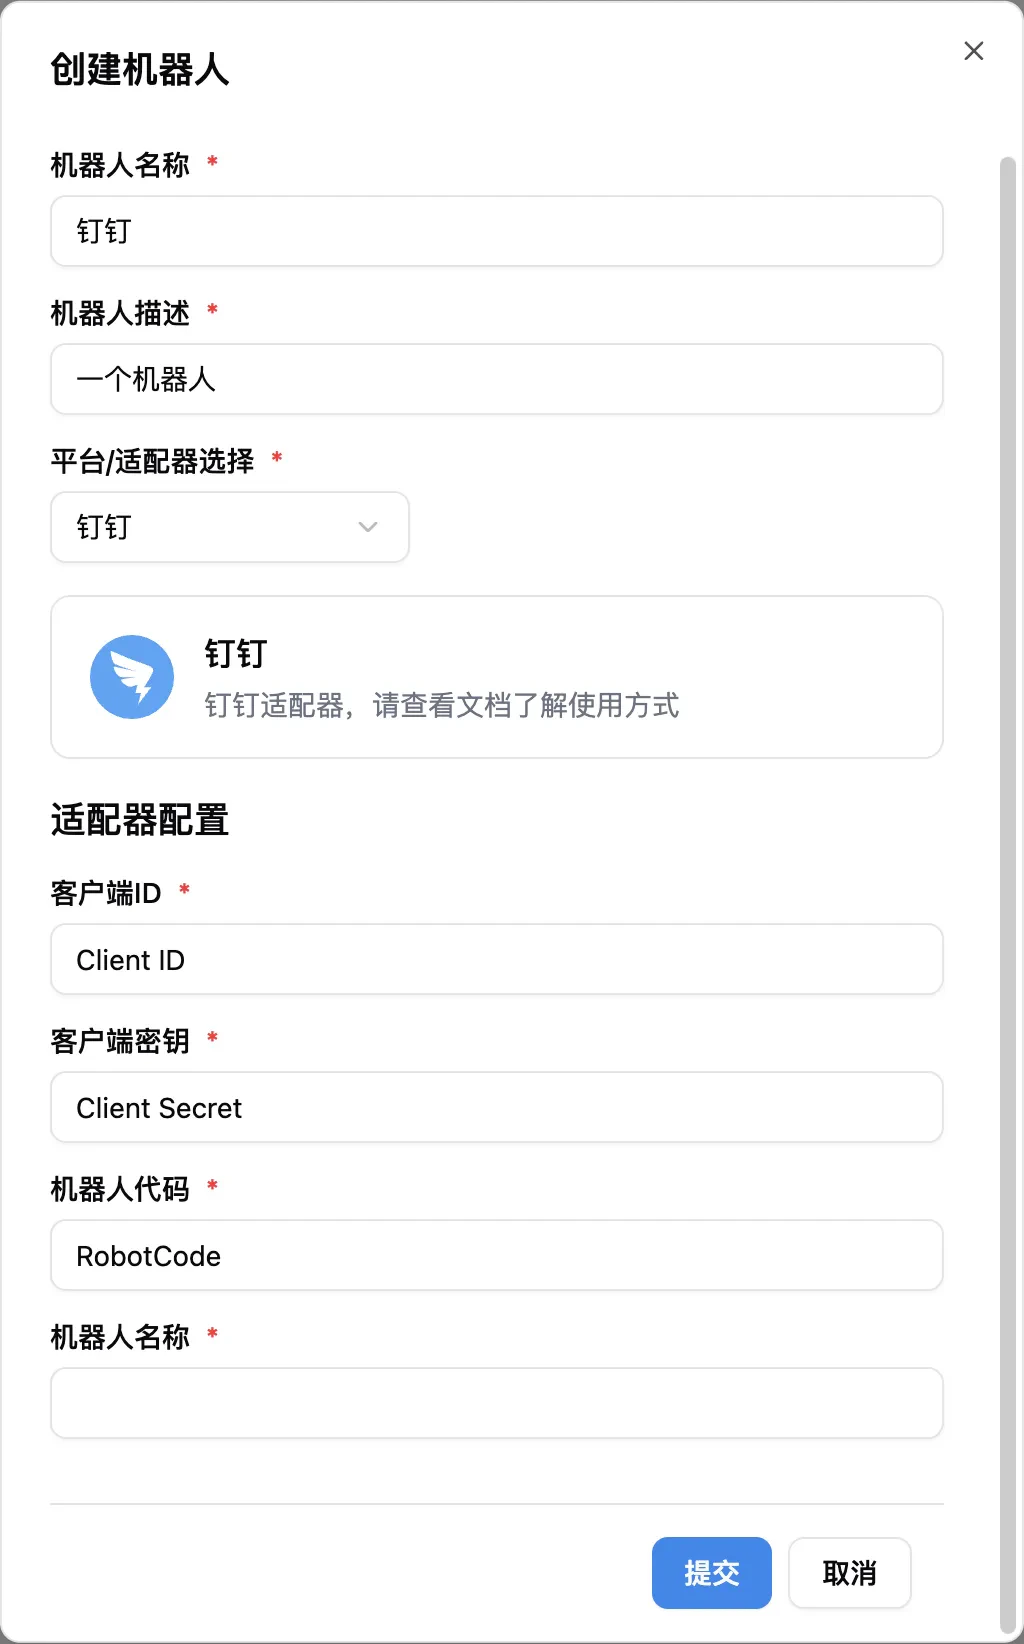 2、绑定流水线(默认已有 `ChatPipeline`),平台选择 **钉钉**。
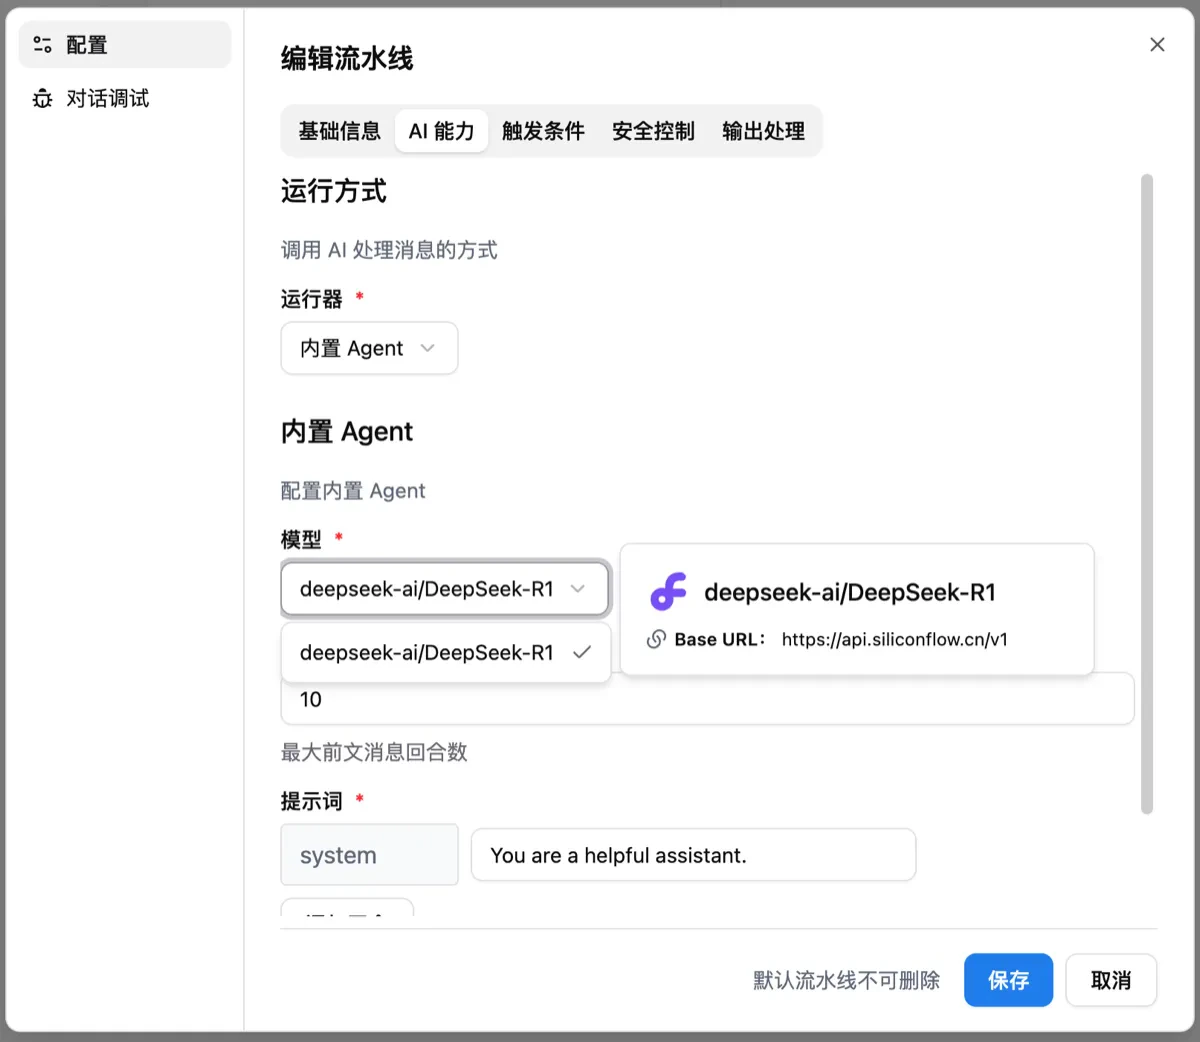
3、编辑流水线,在 AI 能力中选择 **内置 Agent**,并选择此前配置好的模型。
2、绑定流水线(默认已有 `ChatPipeline`),平台选择 **钉钉**。
3、编辑流水线,在 AI 能力中选择 **内置 Agent**,并选择此前配置好的模型。
 ### 第四步:使用机器人
1、在钉钉搜索机器人名称,点击即可开始聊天。
2、如需在群聊中使用,可在群设置中点击「添加机器人」,搜索名称添加。
### 第四步:使用机器人
1、在钉钉搜索机器人名称,点击即可开始聊天。
2、如需在群聊中使用,可在群设置中点击「添加机器人」,搜索名称添加。