> ## Documentation Index
> Fetch the complete documentation index at: https://docs.siliconflow.cn/llms.txt
> Use this file to discover all available pages before exploring further.
# Claude Code
> 更新日期:2025年11月17日
本文档安装方式仅适用于 Mac 及 Linux用户
## 方式一:一键安装及配置脚本
1. 在终端中运行以下命令:
```bash theme={null}
bash -c "$(curl -fsSL https://sf-maas-uat-prod.oss-cn-shanghai.aliyuncs.com/sample/ccsf_v260130.sh)"
```
2. 提示输入 API Key 时,粘贴你的 SiliconFlow API Key
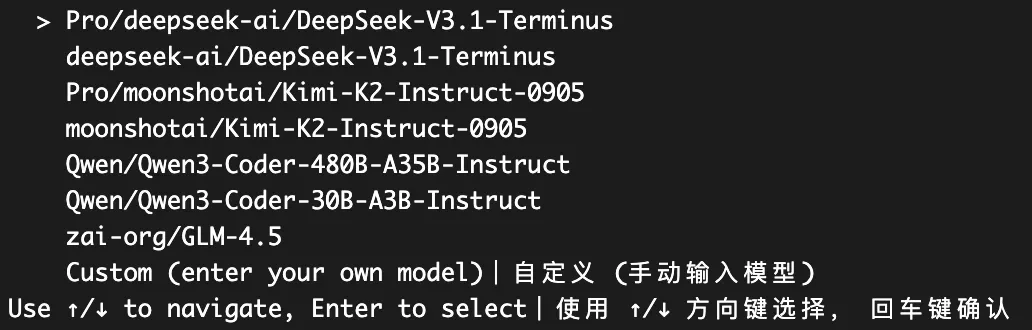
 3. 提示选择模型时,使用方向键选择要在 Claude Code 中使用的模型,或选择自定义,从模型广场复制粘贴想用的模型名称:
 4. 根据提示,复制相应命令并重启终端运行,应用配置:
 5. 执行 claude 命令,进入 Claude Code 并使用
**切换模型使用**
目前 Claude Code 并不支持添加多个自定义模型(Custom Model),您可以再次执行上述 1~5 步,选择并更新 ANTHROPIC\_MODEL 环境变量的方式切换模型
## 方式二:手动配置 Claude Code 环境变量
如果你想手动配置 Claude Code 的环境变量,可以在终端中运行下列命令:
```bash theme={null}
export ANTHROPIC_BASE_URL="https://api.siliconflow.cn/"
export ANTHROPIC_MODEL="moonshotai/Kimi-K2-Instruct-0905" # 可以自行修改所需模型
export ANTHROPIC_API_KEY="YOUR_SiliconFlow_API_KEY" # 请替换 API Key
```
注意:此场景使用时将显著增加 token 消耗
5. 执行 claude 命令,进入 Claude Code 并使用
**切换模型使用**
目前 Claude Code 并不支持添加多个自定义模型(Custom Model),您可以再次执行上述 1~5 步,选择并更新 ANTHROPIC\_MODEL 环境变量的方式切换模型
## 方式二:手动配置 Claude Code 环境变量
如果你想手动配置 Claude Code 的环境变量,可以在终端中运行下列命令:
```bash theme={null}
export ANTHROPIC_BASE_URL="https://api.siliconflow.cn/"
export ANTHROPIC_MODEL="moonshotai/Kimi-K2-Instruct-0905" # 可以自行修改所需模型
export ANTHROPIC_API_KEY="YOUR_SiliconFlow_API_KEY" # 请替换 API Key
```
注意:此场景使用时将显著增加 token 消耗